Forum sponsored by:

Jig - Drilling for rail track
| Speedy Builder5 | 02/08/2023 18:12:16 |
| 2878 forum posts 248 photos |
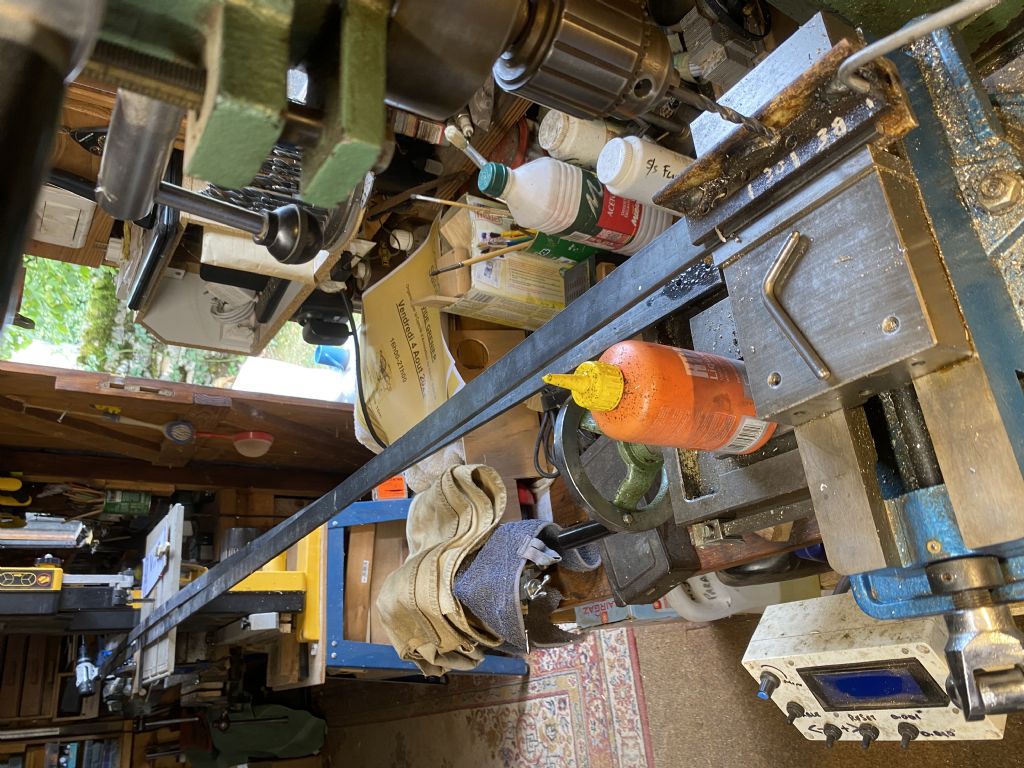
This is mainly for beginners who may be faced with a repetitive job and how a simple drill jig can help. Faced with drilling a few hundred 6 mm holes in some 30 x 6mm steel rail, I made a simple drilling jig. The object was to have a jig mounted on the Mill/Drill and not move the jig, just the rail section. Each end of the rail needed two 6mm holes so that sections could be "fish plated" together. In addition, the same jig would be used to make the fish plates and also used to put holes into the sleeper ends. Back to the rails. The first photo shows a rail section in the jig waiting to be drilled. It is pushed up against a removable dowel pin on the right.
This one shows the first hole being drilled 38mm from the end of the rail. The rail is hard up against the dowel pin.
The last shot shows the rail moved to the left and a second dowel pin located into the first drilled hole (38mm from the end of the rail) ready for the second hole to be drilled 30 mm from the first hole.
All that is left is to turn the rail about (remembering that the holes are offset to the bottom edge of the rail !!). Now off to weld the sleepers to the rail using another jig to space the sleepers in their correct position and space the rails the correct distance apart. A simple jig made of wood which is sacrificial and may get a few weld burns !
|
| Nigel Graham 2 | 02/08/2023 21:56:44 |
| 3293 forum posts 112 photos | Good example of production work!
Be aware that although our lines are not Network Rail distances, they can still be affected by expansion and contraction if quite long and built up too tightly. We found this in my club, which uses 25 X 10mm steel bar rail, with some in plastic moulded chairs screwed to the sleepers, some with welded lugs with a screw-hole each side of the rail. There are a few steel cross-ties welded on but not on every sleeper, mainly some with a hole for a stake to give some lateral stiffness to the whole formation on curves where a combination of expansion strains and the behaviour of the clay ground gave us problems. One part in particular became quite sinuous, and was cured by using L-section fishplates with a narrow flange to support the bar, oversized holes (6.5mm I think, for M6 fasteners) and of course expansion-gaps. ' (In full size the fish-plate is profiled to the rail web, and has elongated holes. I believe it is also greased on the mating surface.) |
| Grizzly bear | 03/08/2023 18:38:03 |
| 337 forum posts 8 photos | Well done, I'm a big fan of jigs, metalwork and woodwork. Bear........... |
| Peter Cook 6 | 03/08/2023 19:01:59 |
| 462 forum posts 113 photos | Sorry, me being a bit thick tonight. I presume that the distance marked as 38mm on the jig is not the distance between centres of the two holes (which it is for the 30mm dimension), but is actually 38mm plus half the diameter of the dowel pin between centres. If not then the first hole is going to be 38mm minus half the diameter of the pin and that would not correspond to the drawing? Or am I missing something! |


Please login to post a reply.
Magazine Locator
Want the latest issue of Model Engineer or Model Engineers' Workshop? Use our magazine locator links to find your nearest stockist!
Sign up to our Newsletter
Sign up to our newsletter and get a free digital issue.
You can unsubscribe at anytime. View our privacy policy at www.mortons.co.uk/privacy
Latest Forum Posts
- hemingway ball turner
04/07/2025 14:40:26 - *Oct 2023: FORUM MIGRATION TIMELINE*
05/10/2023 07:57:11 - Making ER11 collet chuck
05/10/2023 07:56:24 - What did you do today? 2023
05/10/2023 07:25:01 - Orrery
05/10/2023 06:00:41 - Wera hand-tools
05/10/2023 05:47:07 - New member
05/10/2023 04:40:11 - Problems with external pot on at1 vfd
05/10/2023 00:06:32 - Drain plug
04/10/2023 23:36:17 - digi phase converter for 10 machines.....
04/10/2023 23:13:48 - More Latest Posts...
- View All Topics
Support Our Partners


Shopping Partners
Subscription Offer

Latest "For Sale" Ads
- Reeves** - Rebuilt Royal Scot by Martin Evans
by John Broughton
£300.00 - BRITANNIA 5" GAUGE James Perrier
by Jon Seabright 1
£2,500.00 - Drill Grinder - for restoration
by Nigel Graham 2
£0.00 - WARCO WM18 MILLING MACHINE
by Alex Chudley
£1,200.00 - MYFORD SUPER 7 LATHE
by Alex Chudley
£2,000.00 - More "For Sale" Ads...
Latest "Wanted" Ads
- D1-3 backplate
by Michael Horley
Price Not Specified - fixed steady for a Colchester bantam mark1 800
by George Jervis
Price Not Specified - lbsc pansy
by JACK SIDEBOTHAM
Price Not Specified - Pratt Burnerd multifit chuck key.
by Tim Riome
Price Not Specified - BANDSAW BLADE WELDER
by HUGH
Price Not Specified - More "Wanted" Ads...
Get In Touch!
Do you want to contact the Model Engineer and Model Engineers' Workshop team?
You can contact us by phone, mail or email about the magazines including becoming a contributor, submitting reader's letters or making queries about articles. You can also get in touch about this website, advertising or other general issues.
Click THIS LINK for full contact details.
For subscription issues please see THIS LINK.
Digital Back Issues


Donate

 Register
 Log-in
Model Engineer Magazine
- Percival Marshall
- M.E. History
- LittleLEC
- M.E. Clock

ME Workshop
- An Adcock
- & Shipley
- Horizontal
- Mill

Subscribe Now
- Great savings
- Delivered to your door

Pre-order your copy!
- Delivered to your doorstep!
- Free UK delivery!
All Forum Topics > 3D Printers and 3D Printing > Jig - Drilling for rail track