Member postings for Robin Graham
Here is a list of all the postings Robin Graham has made in our forums. Click on a thread name to jump to the thread.
| Thread: Facing parallel between centres. |
| 15/09/2020 00:06:24 |
Posted by JasonB on 14/09/2020 13:14:34:
Posted by blowlamp on 14/09/2020 10:45:34:
So am I correct in thinking that you started this thread after you had actually completed the job
Martin. Yes, if you read it Robin was seeking clarification about the advice previously given, he said nothing about wanting to remachine it between ctrs. Thanks Jason, that is it exactly. I started this thread because I had been advised that the best way to skin this particular cat was to turn between centres. Before working on the riser I tried doing that with a piece of 4" diameter bar which I had to hand. The results were disappointing compared to the faceplate method and I wondered why. Not having had any formal training in machining (apart from 10 hours in the postgrad workshop at the Schuster Lab in Manchester, too many years ago!) I have to try and figure things out as I go along and take advice - this forum has been invaluable to me in that respect. I now have a better grasp of the geometry at least, and shall make further experiments to see what I can achieve with my lathe. Gray/Pete - thanks for the info about the history of of turning. I shall certainly try to get to grips with between-centres work. A plane is a space spanned by two linearly independent vectors in my book. My mistake was to think that the surface produced by facing is necessarily planar - obviously not, as Hopper pointed out. Looking back I see that I was trying to view a 3D problem in 2D, and that's where I got confused. I remember reading somewhere that Roger Penrose, when lacking anything more interesting to do, would occupy his idle hours by mentally tessellating four dimensional planes. Or something. Good God, I struggle to think in 3D! Robin Edited By Robin Graham on 15/09/2020 00:25:40 Edited By Robin Graham on 15/09/2020 00:29:59 Edited By Robin Graham on 15/09/2020 00:34:38 |
| 14/09/2020 00:30:10 |
Many thanks for replies. Looking at Hopper's diagram I see where I went wrong in my thinking - my mental model was that in an ideal world where the cross slide is perfectly perpendicular to the lathe axis it would have to cut a plane perpendicular to the lathe axis. Obviously (now) not true across the diameter - I did say I have problems with 3D visualisation! It's embarrassing as I know full well that the lathe faces slightly concave under the best conditions and understand the how and why of that. I knew there was something suspicious about my reasoning, just couldn't decide what and missed the wood for the trees. I blame the guy who taught me about conic sections! I finished the riser by bolting to the face plate with M8 studding though the spindle and tailstock support: I'm happy, in the light of comments, that I got as good as half a thou. On a Far Eastern lathe! Robin
Edited By Robin Graham on 14/09/2020 00:31:51 Edited By Robin Graham on 14/09/2020 00:34:42 |
| 13/09/2020 00:34:10 |
Posted by Ady1 on 13/09/2020
Between centres work can be exceptionally difficult on a hobby machine Edited By Ady1 on 13/09/2020 00:15:34 Can you explain that further Ady? What are the problems? Robin. |
| 13/09/2020 00:19:46 |
Well, I do have a gigantic dog who sometimes who watches me me turning, but I've yet to put her onto workholding duties. Luckily the nature of the work allows a drive pin in this case. Robin
Edited By Robin Graham on 13/09/2020 00:20:05 |
| 12/09/2020 23:38:33 |
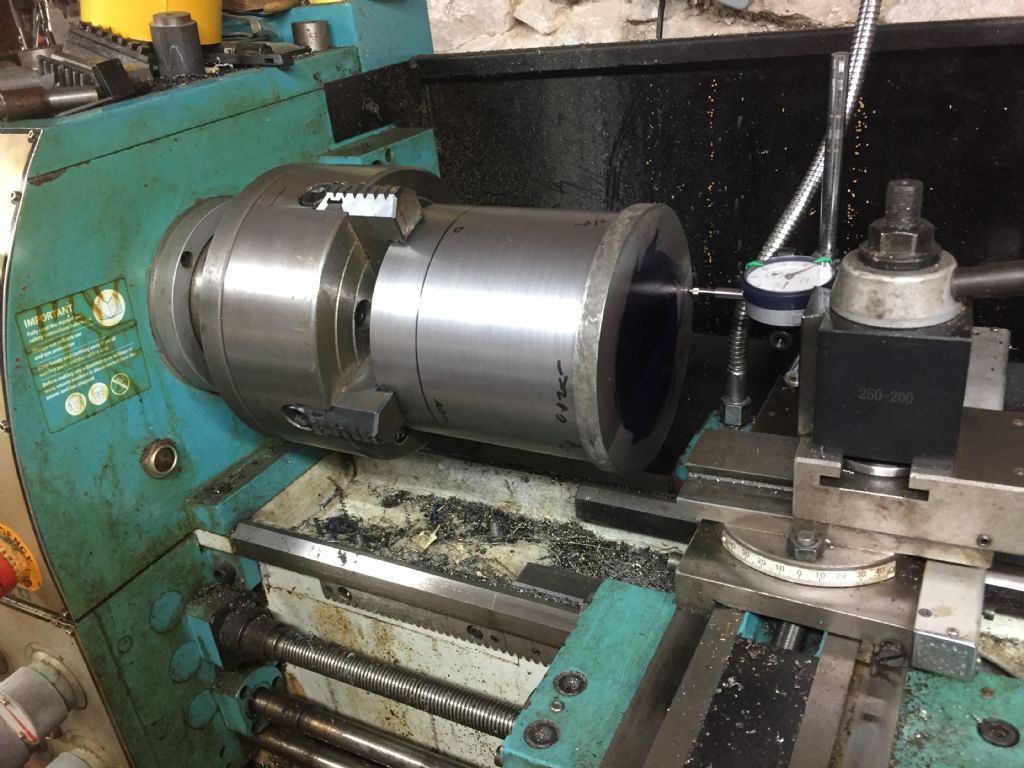
I've posted recently about turning risers for VMC mills. The biggest new challenge for me was getting the ends of a 4-5 inch long 6 inch diameter round bar parallel using a lathe. I got to about half a thou over 6" diameter / 4" long by bolting to a faceplate - I was quite pleased with that, and I expect it'll be fit for purpose. However, the advice I had here was that the best way to do this is between centres. I tried that on a 4" diameter test piece and it came out about 1.5 thou wrong over the diameter. I'm confused! I'm pretty bad at visualising things in 3D, but I think that even if the head and tail stock centres are misaligned the faces should end up parallel. That is turning the work end for end and facing at the tailstock end. I might well be wrong though! Any advice would be welcome - I'd like to track this down. Robin.
Edited By Robin Graham on 13/09/2020 00:04:23 Edited By Robin Graham on 13/09/2020 00:05:00 |
| Thread: Faceplate workholding. |
| 09/09/2020 22:40:16 |
Thanks for the suggestion Jason - I tried the stub in the 3-jaw method but found I was still about 40 microns out of parallel over a 100mm diameter. That was turning the bar end-for-end between the stub and the tailstock centre and facing at the tailstock end. I'm not sure why, but will investigate. When I realised (duh!) that that I could combine the screw though the spindle with tailstock support: I went for the faceplate method. Cripes, I thought, I bet I'm in for another disappointment. But it came out within 12 microns parallel over 140mm. I'm well chuffed with that. Robin
Edited By Robin Graham on 09/09/2020 22:44:26 Edited By Robin Graham on 09/09/2020 22:59:24 Edited By Robin Graham on 09/09/2020 23:04:52 |
| Thread: Jobs we had as kids |
| 09/09/2020 00:47:47 |
Another Brummie - my first job, aged 16, was at the long defunct Chas Clifford non ferrous metal foundry. 10 quid a week I got for analysing the metal coming from the tundishes and making sure it had as little copper in it as permitted by the standard. I'd shacked up with my girlfriend - rent for our flat was £3 a week. Ee, them were the days! When the lab got an X-ray fluorescence machine I was trained to face off the raw samples from the furnaces using a mill - training was 'put it in the vice, tighten up then turn this handle'. No PPE, somehow I survived. Robin. Edited By Robin Graham on 09/09/2020 00:50:33 |
| Thread: Boring chatter (on the lathe) |
| 08/09/2020 22:59:11 |
Posted by not done it yet on 08/09/2020 22:39:31:
If it was 65 degrees the spigot is likely under-sized, now it has cooled down. Cunning fiend that I am I took that into account - which is why I measured the temperature! It'll be spot-on at 22C. Least of my problems. Robin. Edited By Robin Graham on 08/09/2020 23:51:52 |
| 08/09/2020 21:51:48 |
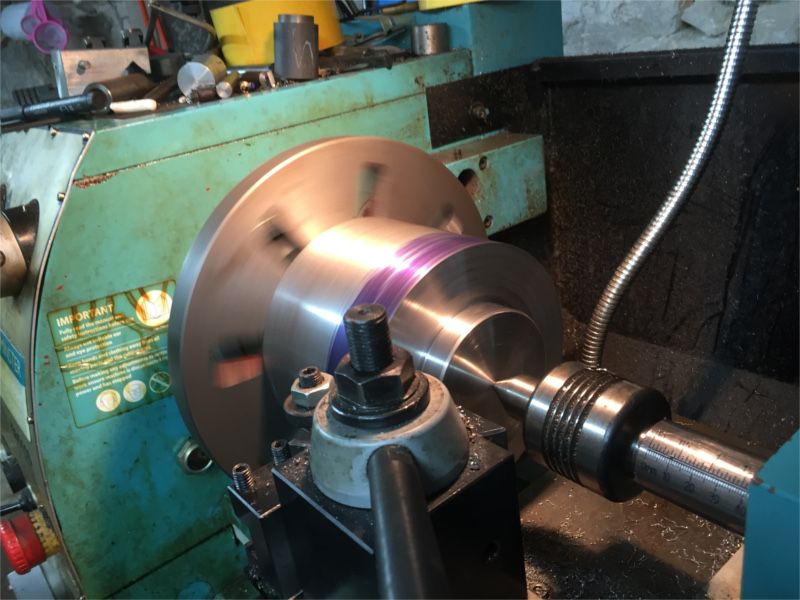
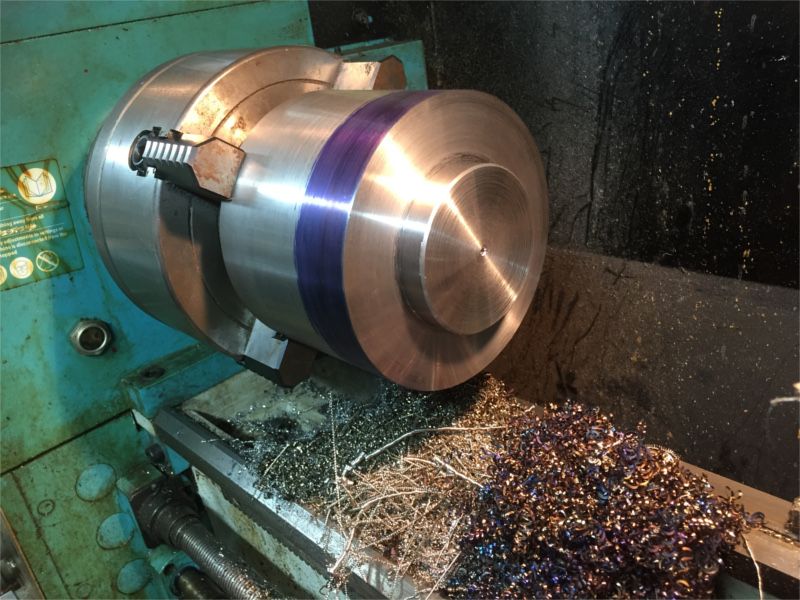
Just to let you know how it went... Despite my worries about the lathe not being rigid enough, after some experimentation with speeds, cuts and feeds I found some sweet (and more sour!) spots. Because I was experimenting using manual feed I can't give numbers, but the general rule seemed to be (counterintuitively) that when the machine starts to complain, increase the feed. Anyhow, I got there: and made some blue chips in the process. By the time I'd finished the work was at 65 degrees C! Thanks again for advice, Robin.
Edited By Robin Graham on 08/09/2020 21:54:06 |
| 07/09/2020 22:38:02 |
Many thanks for advice. I was worried by a post I'd read somewhere (possibly practical machinist) which said that once chatter had set in you'd had it, because the texture (something like basket weave in my case) would just set the tool bouncing again. So I took a light skim with a CCGT insert to try and restore the finish to something more like normal. The CCGT inserts I have are grade H01 and intended for non-ferrous metals I believe, but it worked. Because I was close to finished size and the CCGT was cutting so nicely I just carried on with 0.25mm cuts and got where I wanted to be. I still have the other end to do (it's a VMC riser, about which I have posted before) and shall try the tricks which have been suggested - I've obviously been wimping out on the rpm with CCMT inserts. I'm not totally convinced that my problem is altogether to do with the rigidity of the tool though. I have often bored 50mm+ in 3" steel bar using the same tooling and not had the whisper of a problem. But in this case, with the mass of the 4-jaw and the work combined I'm hanging getting on for 40kg on the spindle. The lathe+stand is about 600kg. A significant fraction. The stand is sheet metal so not as rigid as it might be. It could be that I have (over)reached the lathe's capacity. At least as far as industrial speeds/feeds go!
Robin
Edited By Robin Graham on 07/09/2020 22:44:09 |
| 06/09/2020 00:34:16 |
I want to bore a hole 18mm deep and about 84mm diameter in the end of of a 150mm diameter 100mm long EN1A round bar. The work was set in the 4-jaw: and I started out by drilling to accept the 12mm boring tool. Then I started boring with a 0,4mm tip CCMT insert at 200rpm with 0,2 mm/rev feed, and an 0,5mm DOC. All went smoothly until I got to about 40mm diameter, when horrible chattering set in. My first thought was that it was to do with increasing surface speed as I opened the bore, so I reduced the rpm, but that didn't help. I'm struggling to understand why there should be such a dramatic change in behaviour over such a small interval. Maybe some sort of resonance? Robin.
|
| Thread: Faceplate workholding. |
| 02/09/2020 00:03:27 |
Thanks for replies. This is indeed a VMC riser (in its second inferration*). DaveT, whom I worked with on the first, was happy with the result which was turned in the 4-jaw. I don't think it was as good as it could have been though. In my constant quest for product improvement In view of the skepticism about single point workholding I made some experiments because I wanted to estimate the forces involved. My result was that the coefficient of static friction between an as-turned face on a steel billet and my faceplate is about 0.3. That's low, but the face plate is oily. Combining that with Dave's tonne force from the 8mm screw means I have to exert 300kgf to shift it! I'll try on some scrap. I was put off the between centres method because when I measured the runout on on my headstock centre it wasn't good, but thinking further, maybe that doesn't matter if the aim is just to get the ends parallel. Robin. *It's a new word. Not in the OED yet, but I'm hoping.
Edited By Robin Graham on 02/09/2020 00:05:06 |
| 01/09/2020 00:18:40 |
I'm 95% sure this is OK but as I've never done it before, or seen it on the 'net, I would like reassurance - or otherwise. I'm thinking to fix a 150mm diameter by 100mm long round steel bar (so about 14kg) to the faceplate by tapping an M8 hole centrally at one end and passing M8 threaded rod through the spindle then clamping by tightening a nut/washer arrangement at the back end of the spindle. Is there any reason to think that this arrangement might fail? My aim is to turn the ends of the bar as parallel as possible - so I'm looking at a thou or so facing skim. Reading what I've written I'm up to 99% confidence, but would welcome any comments. I am of a nervous disposition. Robin Edited By Robin Graham on 01/09/2020 00:23:34 |
| Thread: Ring rollers - anything known? |
| 25/08/2020 20:57:21 |
Arrived today. The Chronos spec is correct: 1" is the theoretical minimum radius (hence "achievable" I suppose) but 1,25- 1,5" more reasonable given spring. I think radius and diameter have been transposed in the eBay specs. So fine for my purpose - 7cm radius wouldn't have been tight enough. Robin.
|
| Thread: Laptop power supplies |
| 25/08/2020 00:39:15 |
Thanks for replies. Perhaps I could have put my question more clearly. My reason for thinking that the charger jack plug is failing to short circuit looked at from the computer end is that when when in the 'wiggle position' which doesn't give 20.04V, my multimeter gives 0.00mV rock solid. I've seen that before only when the test leads are shorted - looking into an open circuit the MM will flicker by some mV's depending on how many itinerant electrons are about I suppose, but never is the readout solid. The battery isn't completely knackered - by using an arrangement of toolmaker's clamps (wife - 'where on earth did get you those from?' She's in for a few surprises if she has to clear the cellar out after I'm gone!) I got charge into the battery, it took a couple of hours to charge but the computer said 100%. So all was working well with a charged battery and mains plugged in. But then the dog decided to sit next to me and disrupted the clamps - the computer shut down instantly. So I restarted the machine from the battery with the charger unplugged - that worked fine, and the computer said 91% battery charge. Then I plugged in the charger - the computer shut down instantly. It was this sequence of events that made me wonder if the machine somehow sensed a short on the charger input. I'll go for a mid range replacement charger. Thanks for your generous offer AJAX, but it's a 'slim tip' rectangular plug I need. Robin |
| 23/08/2020 23:17:09 |
My wife's Lenovo laptop has taken to suddenly shutting down without warning - straight from working to a black screen and no power-on light. I think I've tracked it down to the charger (she always use it plugged in to to the mains). Looking at the output from the charger jack, it goes from 20.05V (expected) to 0.00mV with wiggling. I know next to nowt about electronics, but I do know that my multimeter only reads a solid 0.00 when it's looking at a short circuit. So presumably the charger jack plug is failing to short circuit from the computer's point of view. My naive theory is that when the battery protection circuitry sees a short on the charging input it just shuts the battery down, and as there is no direct power either the computer stops. It's no doubt much more complicated than that as electronic things always are! Questions:
Robin.
|
| Thread: Ring rollers - anything known? |
| 22/08/2020 19:59:13 |
Thanks for replies. I was hoping that someone might have used one of these tools, but that was a long shot I suppose. Thanks for pointing out the Chronos offering Jason - I hadn't lit on that. Although not consistent with the eBay vendors I think it's possible that their specs can be cudgelled into internal consistency. They say that a 1" radius is "achievable" , so maybe 2" diameter is the best case scenario and 3" diameter a more typical limit. That seems more reasonable than the discrepancy between a 1" diameter and a 70mm radius The descriptions of the various eBay offerings are very similar to each other - it looks like they are all copied from the same source, so it may be that there are translation errors in the source document. In fact, if one transposes radius and diameter, the eBay specs read 1" radius and 70mm diameter. Not so far off the Chronos specs. A quick Google reveals that that the Chinese have one ideogram which represents range, scope, extent, limits, radius, and another that represents path, diameter, way. So anything might happen! Any Chinese speakers out there...? On the basis of this perhaps specious reasoning I have ordered the SwitZer which MichaelG pointed out. I want to roll 1/8th CZ108 brass (not armour plate oddly enough) so I'm hoping I can get somewhere near 2.5" diameter. I'll report back when it arrives. Robin. Edited By Robin Graham on 22/08/2020 20:02:01 Edited By Robin Graham on 22/08/2020 20:03:08 |
| 21/08/2020 22:20:14 |
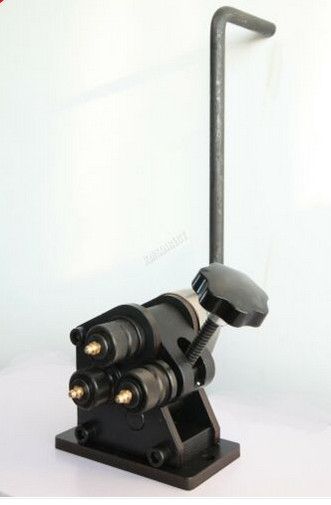
A number of eBay vendors are selling ring rollers like this: They are branded differently, but clearly the same tool with minor variations. Some, but not all, vendors say the tool will produce rings from 1" diameter upwards but in the tech specs they all give a minimum bend radius of 7 cm. Can anyone advise as to the what the minimum radius actually is? To give an idea of scale, vendors seem to agree that the tool is 18 cm in height (excluding handle). Seems unlikely to me that the tightest ring it can it can do is 140mm diameter, but I have never used bending rolls so can't really judge. Robin.
|
| Thread: Bandsaw blade speed for brass. |
| 19/08/2020 23:54:16 |
Result! I ended up getting a half inch 18TPI carbon steel blade from Tuff Saws. Cuts 1/8 and 1/16 CZ108 brass sheet at 380 m/min like butter - no chattering, just the faintest click when the weld goes through. No need for cardboard cushion. The most surprising thing was that I cut some 12" long 3/8 strips from the sheet and they were parallel to better than a thou. That shouldn't be possible on a hobby wood saw! Hardly dare to breathe on the thing in case I move something. Thanks again for advice, Robin. Edited By Robin Graham on 19/08/2020 23:55:26 |
| Thread: How good is a good faceplate? |
| 18/08/2020 23:21:32 |
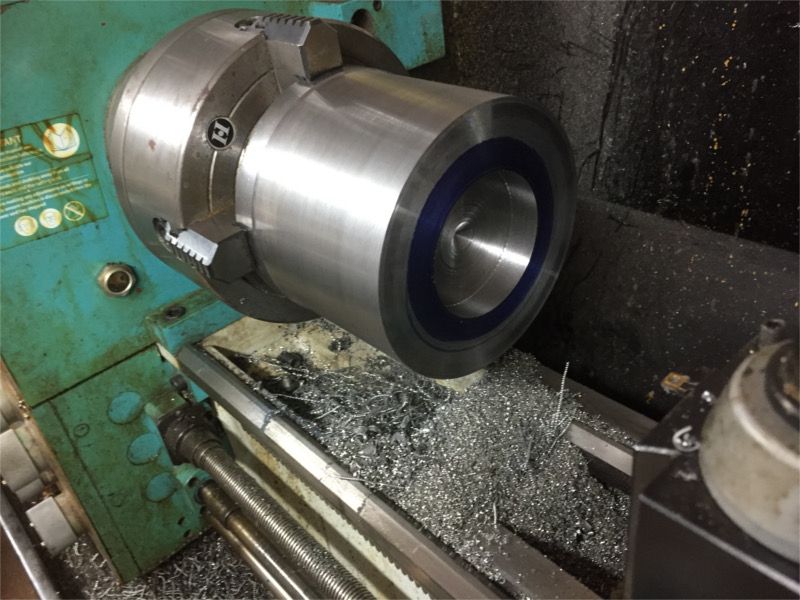
Thanks for replies. It's reassuring to know that my plate is OK, and I take the point that if I mounted it again it would measure up differently. I'm envious of Jason's precision though! As things turned out the job was turned and faced one end in the 3-jaw, then reversed and set in the 4-jaw to finish: Slightly scary swinging a 24kg 160mm diameter billet at 700rpm (there was a time-served RR engineer present, he said it was OK!). Anyhow, it worked and no people or machines died. It's been an instructive project on several fronts. I'm learning I hope! Robin. PS the 700 rpm stuff was with tailstock support before anyone has a heart attack. R. Edited By Robin Graham on 18/08/2020 23:27:30 Edited By Robin Graham on 18/08/2020 23:35:47 |
Want the latest issue of Model Engineer or Model Engineers' Workshop? Use our magazine locator links to find your nearest stockist!
Sign up to our newsletter and get a free digital issue.
You can unsubscribe at anytime. View our privacy policy at www.mortons.co.uk/privacy
- *Oct 2023: FORUM MIGRATION TIMELINE*
05/10/2023 07:57:11 - Making ER11 collet chuck
05/10/2023 07:56:24 - What did you do today? 2023
05/10/2023 07:25:01 - Orrery
05/10/2023 06:00:41 - Wera hand-tools
05/10/2023 05:47:07 - New member
05/10/2023 04:40:11 - Problems with external pot on at1 vfd
05/10/2023 00:06:32 - Drain plug
04/10/2023 23:36:17 - digi phase converter for 10 machines.....
04/10/2023 23:13:48 - Winter Storage Of Locomotives
04/10/2023 21:02:11 - More Latest Posts...
- View All Topics
- Reeves** - Rebuilt Royal Scot by Martin Evans
by John Broughton
£300.00 - BRITANNIA 5" GAUGE James Perrier
by Jon Seabright 1
£2,500.00 - Drill Grinder - for restoration
by Nigel Graham 2
£0.00 - WARCO WM18 MILLING MACHINE
by Alex Chudley
£1,200.00 - MYFORD SUPER 7 LATHE
by Alex Chudley
£2,000.00 - More "For Sale" Ads...
- D1-3 backplate
by Michael Horley
Price Not Specified - fixed steady for a Colchester bantam mark1 800
by George Jervis
Price Not Specified - lbsc pansy
by JACK SIDEBOTHAM
Price Not Specified - Pratt Burnerd multifit chuck key.
by Tim Riome
Price Not Specified - BANDSAW BLADE WELDER
by HUGH
Price Not Specified - More "Wanted" Ads...
Do you want to contact the Model Engineer and Model Engineers' Workshop team?
You can contact us by phone, mail or email about the magazines including becoming a contributor, submitting reader's letters or making queries about articles. You can also get in touch about this website, advertising or other general issues.
Click THIS LINK for full contact details.
For subscription issues please see THIS LINK.
Model Engineer Magazine
- Percival Marshall
- M.E. History
- LittleLEC
- M.E. Clock
ME Workshop
- An Adcock
- & Shipley
- Horizontal
- Mill
Subscribe Now
- Great savings
- Delivered to your door
Pre-order your copy!
- Delivered to your doorstep!
- Free UK delivery!



 Register
 Log-in


