Member postings for Dan Shilling
Here is a list of all the postings Dan Shilling has made in our forums. Click on a thread name to jump to the thread.
| Thread: DEPTH MICROMETER reassembly |
| 27/08/2023 21:45:58 |
Posted by old mart on 27/08/2023 17:20:52:
When I looked at one of my depth mics, I realised that the lock mechanism holds the depth rod, and has nothing to do with the micrometer thread 10. The collar 3 should be tightened back up in stages with the micrometer thread 10 screwed in halfway, tighten until resistance is felt and then back it off slightly until the thread feels smooth throughout its travel. With the nut 7 removed from 10, find the shortest rod and put it in place within 10 and stand the mic base on a flat surface. Then unscrew the thread 10 until it just touches the head of the rod. You then remove the rod and fit the barrel 11 with the zero in line with the inner scale. Take care not to turn 10 as you fit 11. Hold the parts together tightly on the taper as you fit nut 7. Then assemble with the shortest rod and screw on 6 finger tight. Check how close you are to zero using the flat surface. If you are close, a fine adjustment to the inner barrel 9 can be made by turning it, or if the zero is too far, then unscrew 7, break the taper and try zeroing again. This requires some patience, and luck. Hopefully, the rods will still be set, they are difficult to calibrate. Before reassembly, you should use a spray degreaser (not water based) and lubricate the threads with light oil. Thanks for running through that. I have followed it carefully and I am pleased with the result and you're right it does require some patience! |
| 26/08/2023 14:15:49 |
Posted by old mart on 25/08/2023 21:10:48:
The screw 10 should unscrew from the base of the mic, (RH thread). The lock might be jammed and should be backed off or maybe totally removed first, the 4.1 to 4 series of parts. If you still cannot unscrew 10, then you will have no option but to unscrew 3 about 1/2 a turn, as that would also clamp 10 and make it hard to turn. Have you got the spanners that are made for this mic? Edited By old mart on 25/08/2023 21:17:32 The lock is free. I has to resort to unscrew 3 1/2 a turn as you suggested - luckily I have the spanner for 3. 10 then came out easily I think it was turned in too much. Not sure how tight that thread should feel - at the moment I have tightened it with a slight play. I have reassembled to check it 'works' though unlikely to be accurate anymore. But it seems the rods that came with it are from some other micrometer unfortunately as they are quite a bit smaller in diameter.
|
| 26/08/2023 14:07:23 |
Posted by noel shelley on 25/08/2023 22:13:09:
If you get it working then I can give you the dimensions of spanner 14 which is needed to set /calibrate the rods. Good luck. Noel. I managed to release the spindle and get it back together but as yet adjusted. Yes dimensions of spanner 14 would be good however I noticed the rods that came with it are 1/8" and float quite a bit so I wonder if they are for this gauge after all! |
| 25/08/2023 20:57:02 |
Posted by old mart on 25/08/2023 20:31:00:
The micrometer leadscrew minus the nut has a tapered part next to the nut thread and there is a corresponding taper inside the barrel, part 11. When the parts 10 and 11 are tgether the thread for the nut 7 should be visible. What ever you do, never hold the threads on part 10 with anything metallic, you will scrap the lot, use only plastic pads if you must grip them in pliers. Do not do up the nut 7 tight yet as adjustments will have to be made. thanks for that info I definitely won't touch nut 3 now that I know or the threads on 10. it all goes together as you describe only it seems the leadscrew (10) is stuck, so much so that the taper does not touch part 11 anymore. I cannot think how to free (10) as shown on my last photo. I suppose normally it should undo freely. As it is a taper a collet chuck probably would just slip off or worst ruin the taper. |
| 25/08/2023 18:38:46 |
Posted by noel shelley on 25/08/2023 16:45:04:
Forgive me asking but you do realise that you need the depth rods for it to be any use ? As shown in the above post. Noel it came with some rods, lets say enough to be useful and the spanner shown as 13 but not 14 & 15. Not sure if this can be saved at the moment: nut 3 is too tight to undo - possibly LH - and I think spindle 10 is there but stuck as shown on the last picture of the OP. Edited By Dan Shilling on 25/08/2023 18:41:02 |
| 25/08/2023 15:58:51 |
Posted by David Jupp on 25/08/2023 15:53:50:
You might be able to download a parts list for it from the Mitutoyo web site David yes it seems to be this one thank you for the suggestion.
Edited By Dan Shilling on 25/08/2023 16:01:44 Edited By Dan Shilling on 25/08/2023 16:08:41 |
| 25/08/2023 15:35:46 |
I was given this MITUTOYO 129-128 0-3" DEPTH MICROMETER; however I'm not sure if something is missing or how to put it back together again. Any suggestions apart from the bin! Please see photo's.
|
| Thread: Identify tools |
| 12/04/2023 19:03:36 |
Posted by Tim Stevens on 12/04/2023 17:27:47:
The two cones may well serve as formers for sheet metal bending or forming. Or as parts of a spinning lathe (no, not a lathe which is spinning, but for the operation called metal spinning where you start with a flat circle of sheet and press the metal as the former spins, in stages, to produc cups, headlamp reflectors, etc). The thing with the big tommy-bar looks like a spanner to turn, or hold, a splined shaft while you do things to it, or perhaps with it. It might be used to control the chuck which holds one or other of the conical tools. Was anything else included in the same job-lot? Cheers, Tim nothing exept some chipped end mills - those cones are about 1 1/2" long. I thought they could be some kind of hole centre finders. Came with vertical milling machine. Edited By Dan Shilling on 12/04/2023 19:04:29 Edited By Dan Shilling on 12/04/2023 19:06:46 |
| 12/04/2023 16:31:48 |
Hopefully somebody can identify in picture what these tools are for: 1 cone shaped (tools centre and left) 2 inner spline shaped (tool right)
Edited By Dan Shilling on 12/04/2023 16:32:25 Edited By Dan Shilling on 12/04/2023 16:33:45 |
| Thread: Colchester Bantam 127 change gear |
| 17/02/2023 15:59:39 |
Posted by Brian Wood on 17/02/2023 15:04:37: the 120/127 combination gear can be approximated to a combination based on 17/18 instead which is very close in result to the pucca version. Thus 85/90 might be a more readily obtainable pair to build into the gear train Edited By Brian Wood on 17/02/2023 15:05:05 Thanks Brian, did not think of that and that combination probably more cheaper too. |
| 17/02/2023 14:07:27 |
Thanks all, seems could work either way maybe that gear in the picture is some after market clone like RDG offer. The RGD clones I've got are very good though not available in 127 unfortunately. |
| 17/02/2023 11:00:12 |
I was wondering if the Colchester Bantam seventies model 127 change gear has a spline? The reason I ask is recently this gear came up without one which would make it easier to make or have made. See picture. Anyway if somebody could confirm that would be great and what is the position of those three holes relative to?
Edited By Dan Shilling on 17/02/2023 11:00:51 |
| Thread: clarke tungsten tap & die |
| 14/02/2023 08:25:00 |
Thanks all for explaining this. At first I was hesitant to ask but I'm feeling glad I asked now. I've decided to buy some supposedly old unused G&J Hall dies from ebay for what I need at the moment. We'll see how unused they really are when they arrive and hopefully they will last better than the sealey, clarke ect. sets.
|
| 13/02/2023 21:26:58 |
Posted by Bill Phinn on 13/02/2023 20:44:07:if you plan to cut threads long term go out and buy decent taps and dies one by one as you need them.
Edited By Bill Phinn on 13/02/2023 20:44:50 I think this sounds like the best way to go |
| 13/02/2023 19:18:33 |
I was wondering if tungsten taps & dies are better than HSS such as these clarke tungsten set: https://www.machinemart.co.uk/p/cht302-24-pce-tap-die-set/ It is the first time I've seen a tungsten set usually they are HSS or cheap carbon steel.
Elsewhere I've read tingsten steel 'is' HSS so a bit confused if these clarke set are really any good. Perhaps somebody could say.
|
| Thread: C42 C32 C25 Collet |
| 13/02/2023 19:07:47 |
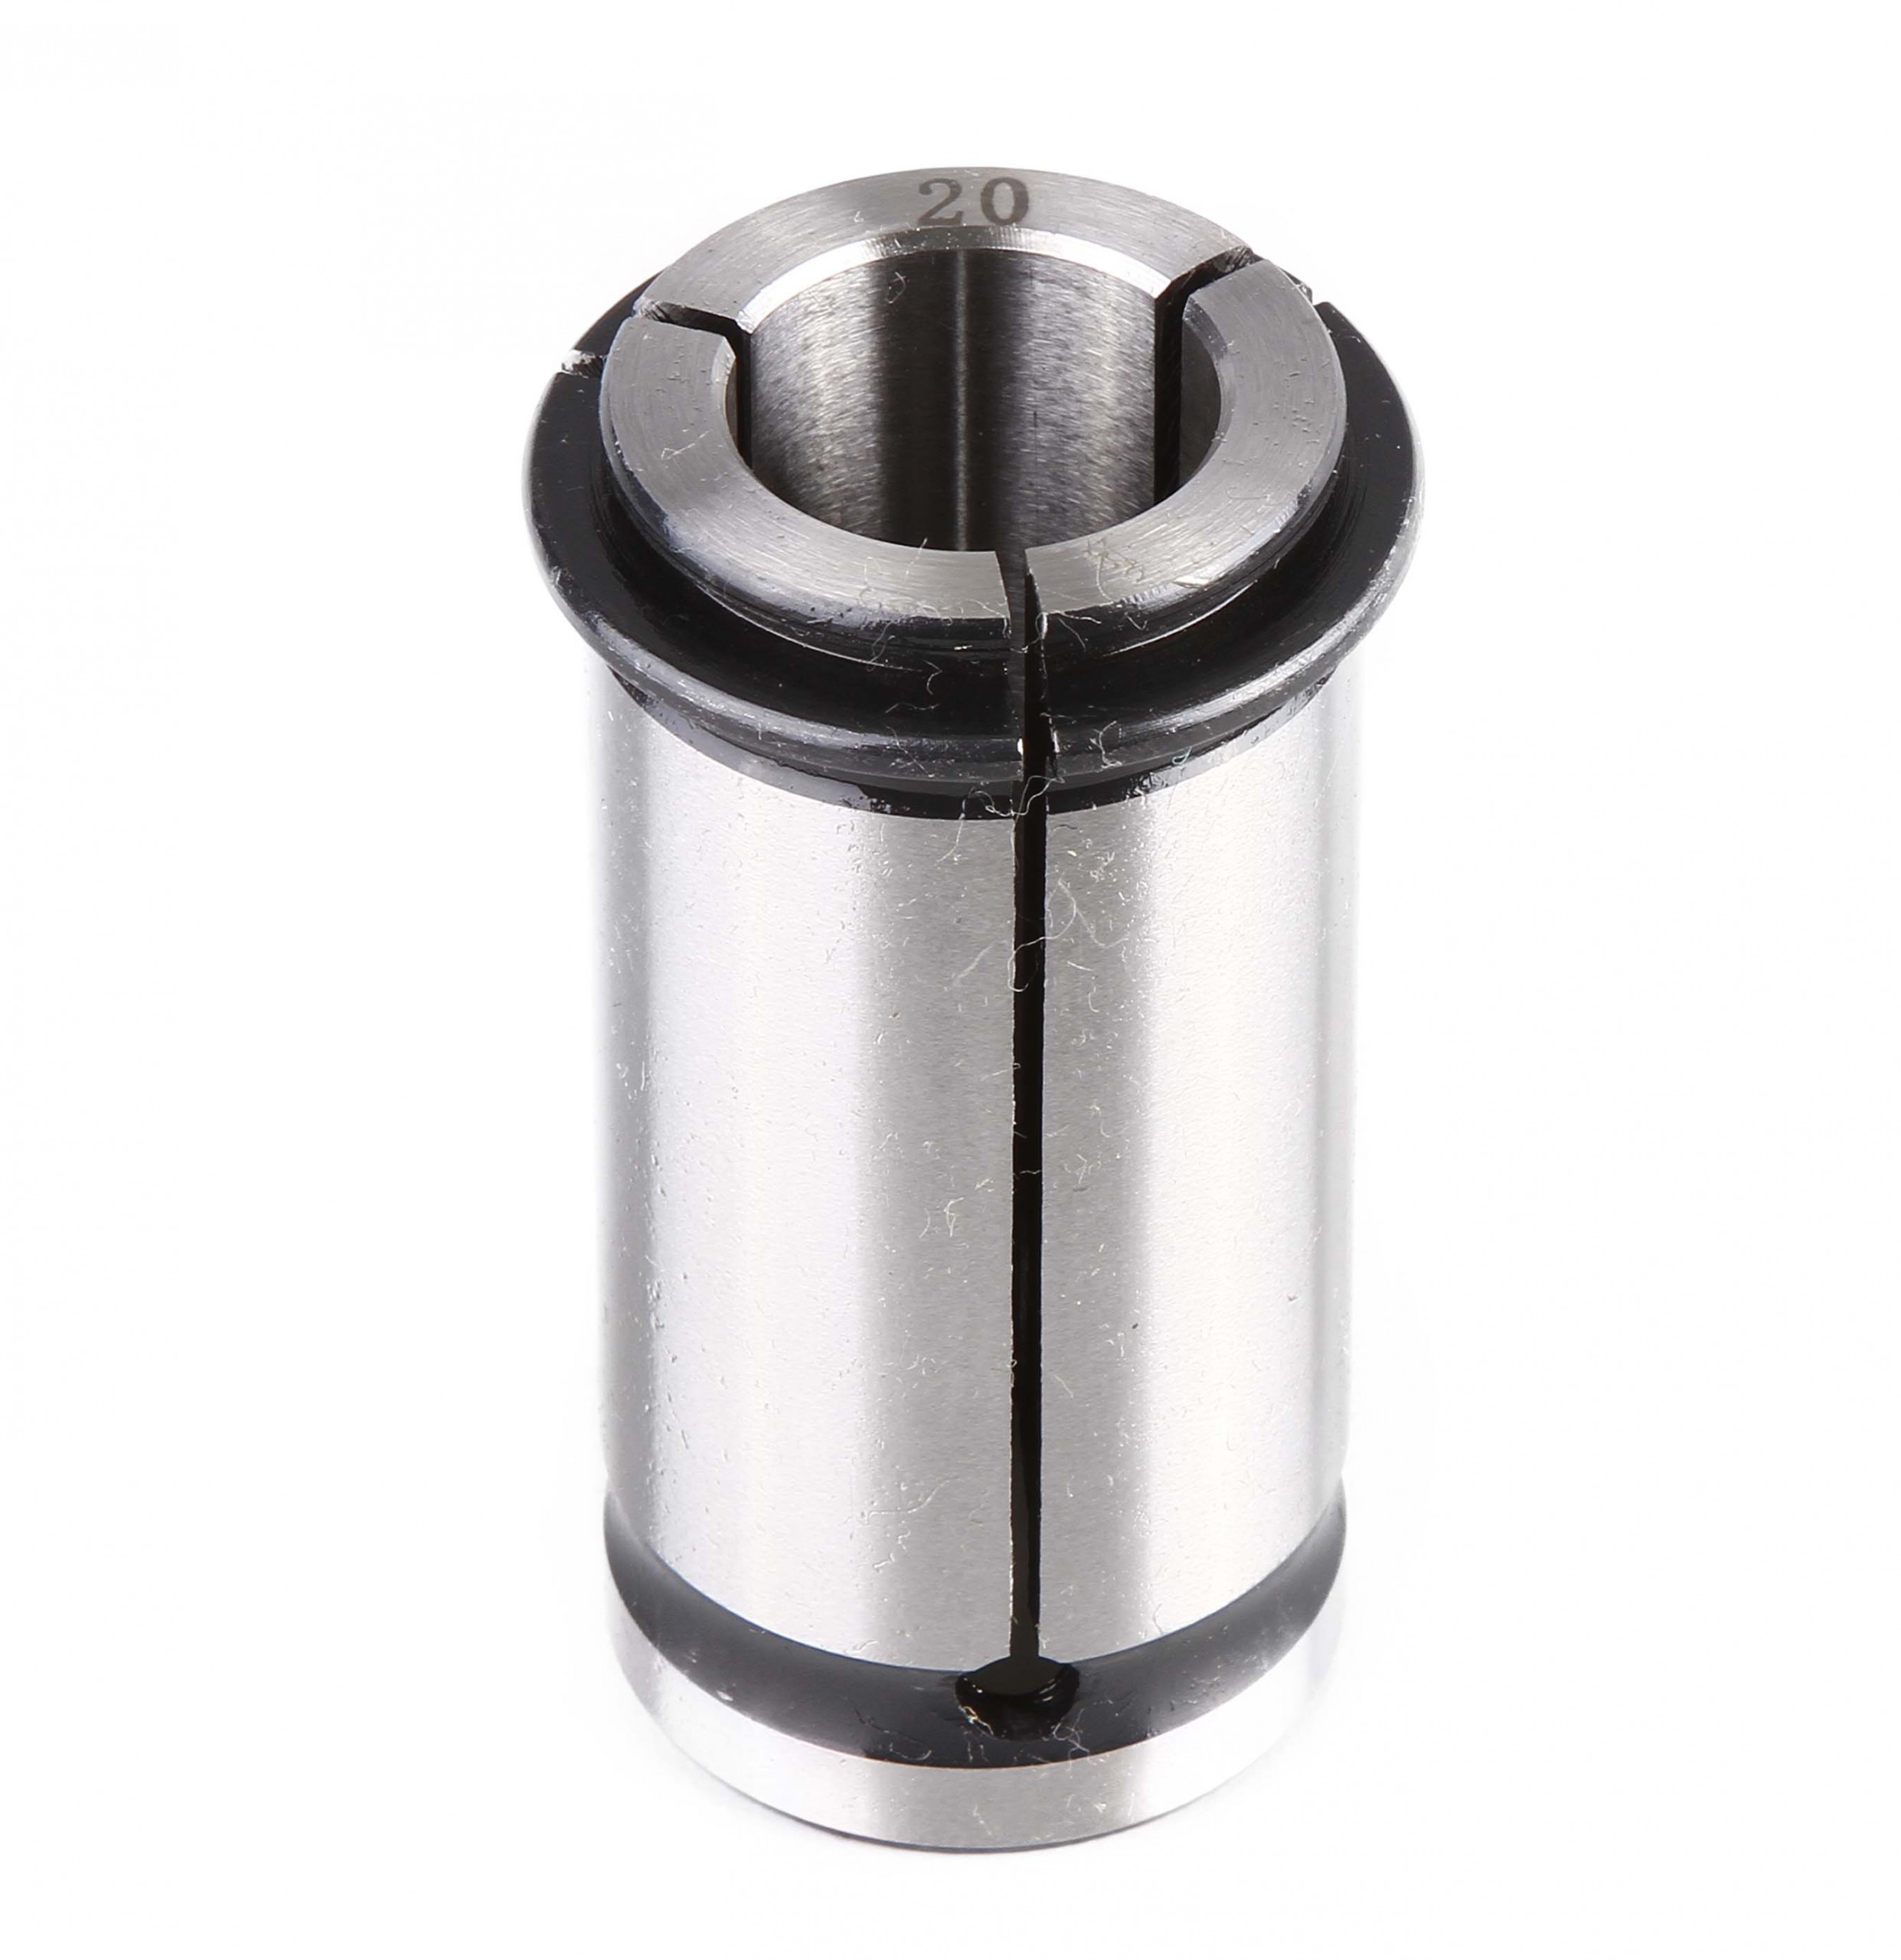
Posted by John Reese on 08/02/2023 01:27:04:
I believe they are collets used with the Big Daishowa high power milling chucks. They are a reducer sleeve for use in that chuck. thanks for the information. |
| 06/02/2023 20:42:39 |
Was wondering what are C42 C32 C25 Collets used for and is there a mt3 holder.
Seem to understand ER collet but not these
|
| Thread: Bantam metric leads crew & half nut |
| 30/05/2021 20:54:50 |
Posted by Brian Wood on 30/05/2021 20:35:07:
Hello Dan, I am surprised that no-one else has mentioned it before now , but surely there are change wheel arrangements that will give you metric threading using an imperial leadscrew. Are there no guidance set ups in a plate fastened to the change wheel cover or elsewhere on the lathe? It would save you a lot of money and the approximations are usually remarkably close. Brian With the 127t change wheel -that I don't have - you can get approximately the metric back just like you can on an imperial machine but some threads such as modular won't work not that anybody tends to make these. It's just if I could get a metric leadscrew it would complete the machine and I could set the machine straight from the plate without fussy calculations and approximations all the time. |
| Thread: Professional rebuild ! (££££???) |
| 30/05/2021 20:46:49 |
that's terrible bad luck they should pay you the full £1250. If you find somebody that can fix that then perhaps you could give me their details because mine needs a metric leadscrew and half nut See my post. If you decide to break it.... well more than it is, then I need a metric leadscrew and half nut.
|
| Thread: Bantam metric leads crew & half nut |
| 30/05/2021 20:30:36 |
Posted by not done it yet on 30/05/2021 19:17:49:
Do you already have a lead screw? If so, one possibility is to replace the threaded portion with a metric trapezoidal screw thread.. Half nuts might likely depend on the machine design. Kingston engineering would quote you for a replacement lead screw with nuts, I expect. I have seen several mentions of Kingston, on this and other fora in the past. All reports have been favourable, but I’ve never needed to avail myself of their services.... I'll look into the kingston option though I have not fully given up finding a good second hand metric leadscew and half nut - seems rare as hens teeth! |


Magazine Locator
Want the latest issue of Model Engineer or Model Engineers' Workshop? Use our magazine locator links to find your nearest stockist!
Sign up to our Newsletter
Sign up to our newsletter and get a free digital issue.
You can unsubscribe at anytime. View our privacy policy at www.mortons.co.uk/privacy
Latest Forum Posts
- hemingway ball turner
04/07/2025 14:40:26 - *Oct 2023: FORUM MIGRATION TIMELINE*
05/10/2023 07:57:11 - Making ER11 collet chuck
05/10/2023 07:56:24 - What did you do today? 2023
05/10/2023 07:25:01 - Orrery
05/10/2023 06:00:41 - Wera hand-tools
05/10/2023 05:47:07 - New member
05/10/2023 04:40:11 - Problems with external pot on at1 vfd
05/10/2023 00:06:32 - Drain plug
04/10/2023 23:36:17 - digi phase converter for 10 machines.....
04/10/2023 23:13:48 - More Latest Posts...
- View All Topics
Support Our Partners


Shopping Partners
Subscription Offer

Latest "For Sale" Ads
- Reeves** - Rebuilt Royal Scot by Martin Evans
by John Broughton
£300.00 - BRITANNIA 5" GAUGE James Perrier
by Jon Seabright 1
£2,500.00 - Drill Grinder - for restoration
by Nigel Graham 2
£0.00 - WARCO WM18 MILLING MACHINE
by Alex Chudley
£1,200.00 - MYFORD SUPER 7 LATHE
by Alex Chudley
£2,000.00 - More "For Sale" Ads...
Latest "Wanted" Ads
- D1-3 backplate
by Michael Horley
Price Not Specified - fixed steady for a Colchester bantam mark1 800
by George Jervis
Price Not Specified - lbsc pansy
by JACK SIDEBOTHAM
Price Not Specified - Pratt Burnerd multifit chuck key.
by Tim Riome
Price Not Specified - BANDSAW BLADE WELDER
by HUGH
Price Not Specified - More "Wanted" Ads...
Get In Touch!
Do you want to contact the Model Engineer and Model Engineers' Workshop team?
You can contact us by phone, mail or email about the magazines including becoming a contributor, submitting reader's letters or making queries about articles. You can also get in touch about this website, advertising or other general issues.
Click THIS LINK for full contact details.
For subscription issues please see THIS LINK.
Digital Back Issues


Donate

 Register
 Log-in
Model Engineer Magazine
- Percival Marshall
- M.E. History
- LittleLEC
- M.E. Clock

ME Workshop
- An Adcock
- & Shipley
- Horizontal
- Mill

Subscribe Now
- Great savings
- Delivered to your door

Pre-order your copy!
- Delivered to your doorstep!
- Free UK delivery!