Member postings for Iain Downs
Here is a list of all the postings Iain Downs has made in our forums. Click on a thread name to jump to the thread.
| Thread: The Workshop Progress Thread (2016) |
| 12/11/2016 16:18:43 |
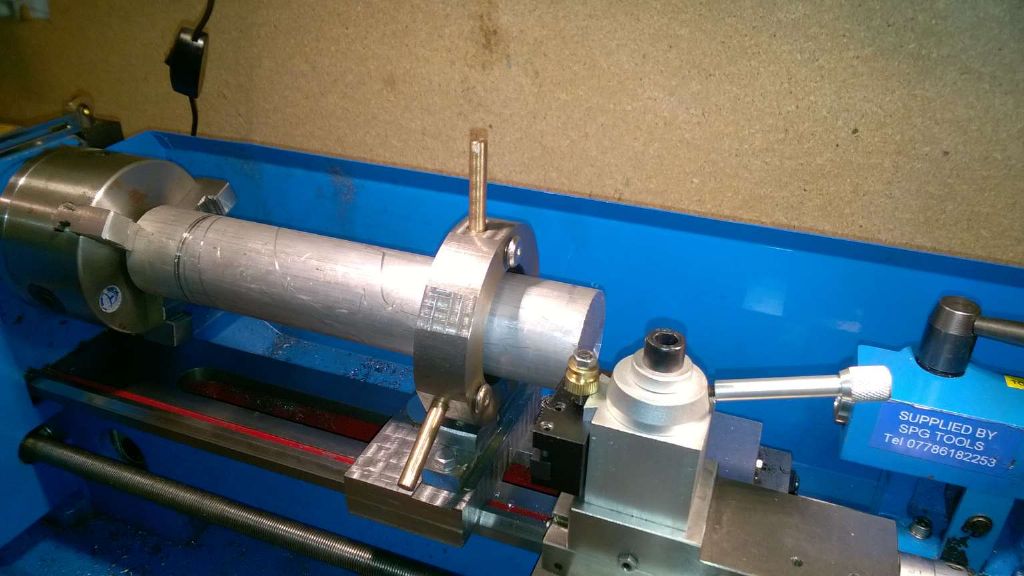
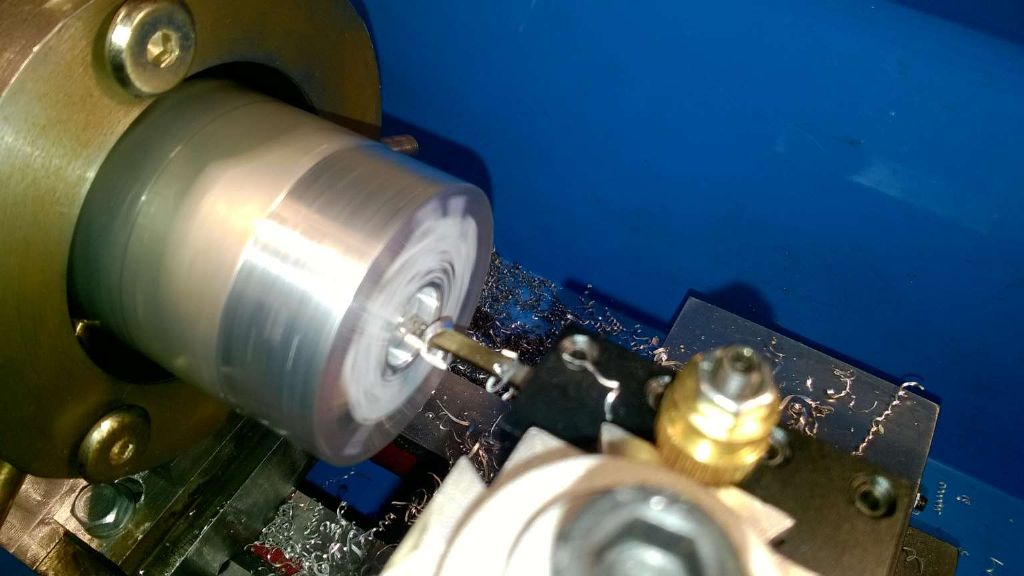
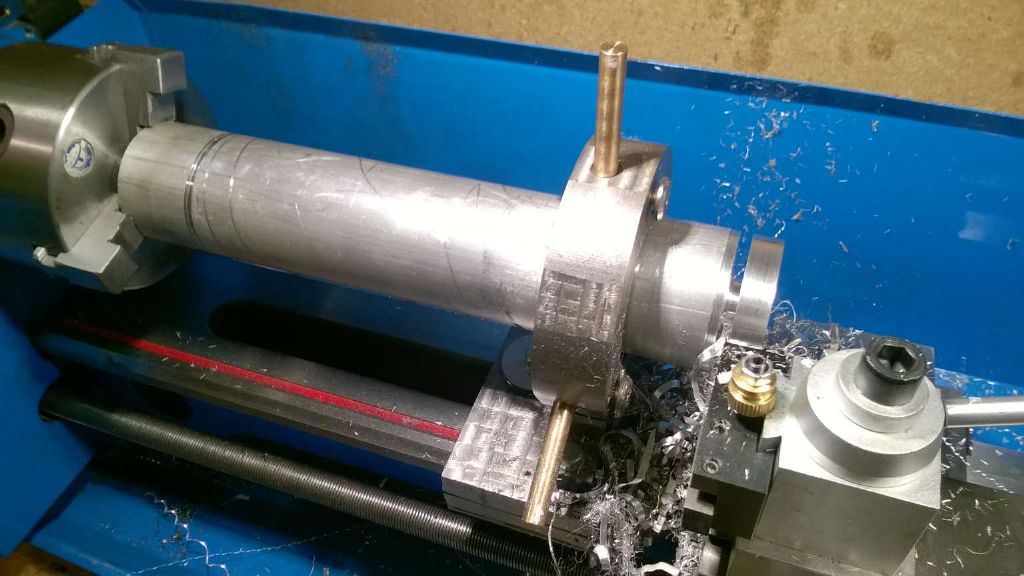
A year after I made my Fixed steady, I've finally got to use it! I'm making a mount for my indicator and all I had was a very long piece of 50mm ally. Facing off Boring And finally, parting off the bit at the end. Dead chuffed I am.
Iain |
| Thread: Stiffness for an indicator mount |
| 12/11/2016 11:32:01 |
Hi, Michael - that's one of the ones I found thanks to Google, but thanks for the link.. For my mount as described above, here are my calculations. Assuming the indicator mounted 200mm up the vertical. compressive strain difference with the 200gms of indicator loaded or not, with a 50x6mm steel bar amounts to about a nanometer (6.67*10^-10). Nothing to worry about there! In terms of the effect of the torsion because the indicator hangs 50mm off the centre of the bar, i *think* the correct way to calculate this is to work out the moment of the indicator (2 N * .05 m) and then apply this moment to the vertical bar to see what the sideways force is. Then calculate the deflection of the vertical bar based on the force. If this is right, the sideways force amounts to 0.5N and the deflection (horizontal) around 1 micron. the change in effective height due to this is stupid small (10E-12 - a picometer?). These values are pretty similar if I use Al instead of steel - by similar I mean totally negligable. As I have some Ally of the right size I will probably give it a go in that rather than wait for some steel. Iain |
| 12/11/2016 09:26:37 |
Following the advice of posters who clearly know more than me, I've dragged my armchair into the shed and commenced some passive engineering. (well, I stayed in the house, really. Warmer and better internet!) I've revised bending. I've tried to do some calculations and got some somewhat conflicting results. Interesting, but I might need some help. The lazy (armchair) approach is to find a calculator online, plug in the numbers and claim personal genius. Sadly you have to understand something of the matter to know what to plug in. The formulae I've found for my round bar are as follows. The 'moment of inertia' - which is more or less how much the bar resists bending is PI * r ^ 4 / 4. As Dinosaur indicated. This then gets plugged into a bending formula which shows the deflection as follows:- deflection = Force * Length^3 /(3 * Youngs Modulus * Moment of Inertia). In short, the deflection is proportion to the cube of the length of the bar - doubling the length increases the deflection at the far and by 8. for my 0.005m radius steel bar I got a moment of inertia of 4.9 * 10^-10 or (careful counting required) 0.00000000049. Plugging that into the other equation, with Steel Young's Modulus at 200GPa and a100mm bar I get a deflection of 0.016mm or about 2/3rds of a thou. (assuming my indicator + mount is about 500gms - a bit high, but...) at 200mm it's .13mm or 4 thou. Sadly, if I use an online calculator I get a slightly different result. There seem to be no metric calculators so Iv'e had to convert to imperial. That gives me a 2 thou or .05mm deflection at 100mm, which is clearly worse. I'm inclined to trust the anonymous computer calculation, but I can't see what's wrong with mine. Marking in red pen by an expert would be appreciated! But broadly with a 100mm long 10mm bar and my indicator, over the 5mm range of measurement I would get an error of several thou as the load on the indicator was relieved by the spring in the needle. Next I want to try and work out how well this would fare in similar circumstances. The idea is to have the indicator and mount bolted to the vertical bar - in either orientation. when as shown above there is a natural balance. If I turned the indicator round I'd need to put a weight on the base to stop it falling over. (I want to keep the base thin so I can slide it things) I can see there is a compressive force down on the bar, but also a moment which will tilt it forward and reduce the height a tiny amount. My gut feel is that the effect will be small, but the mathematics may prove me wrong. However, that effort will require some cooling of the brain, a cup of tea and, most likely getting out of the armchair for a while.
Iain |
| 11/11/2016 18:25:59 |
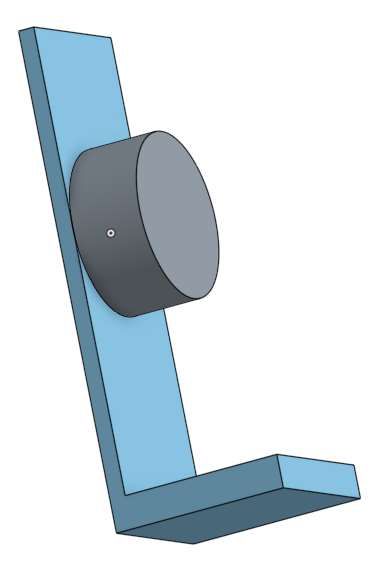
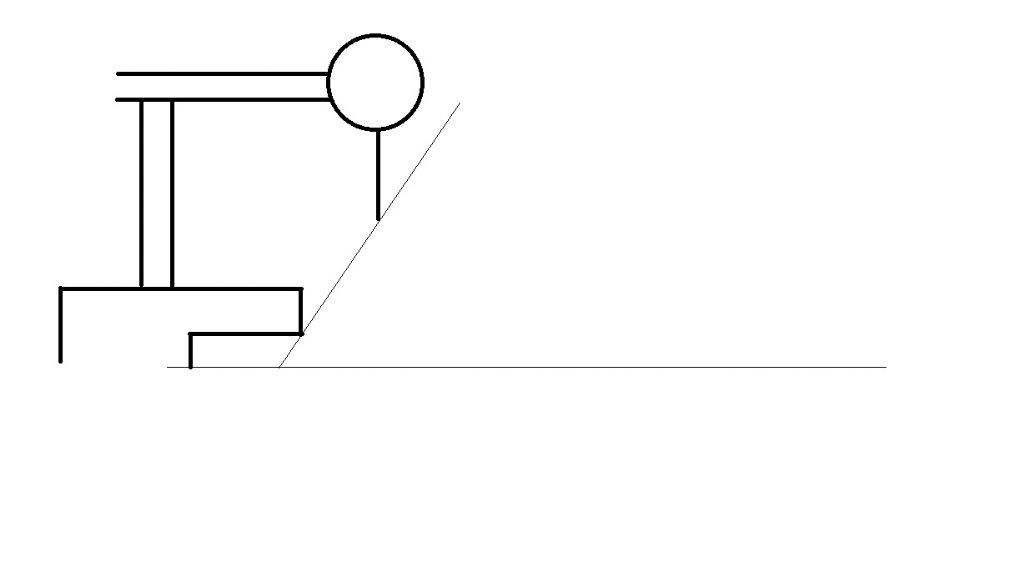
I got a bit confused by the last few posts, but no matter - I've got a lot out of this thread. I'd assumed that the force to displace the indicator needle was small compared to the weight of the indicator. This appears to be wrong. if I hold the indicator above a scale (kitchen) it doesn't really start to read until the scale shows 100 g and that rises to nearly 200 gms and full displacement. The indicator scale covers 5mm but the actual displacement range is nearer 10. So the effective downward force could vary by a considerable amount. Obviously, if I'm comparing one height which 10 microns different to another this is not going to matter, but over a couple of mm it's important. So if I want to compare heights of the order of mm I need a much stiffer mount and base than over microns. The mount I hand in mind looks like this What's changed in my thinking is what that attaches to. One thing I want to do is to check the parallelism of my prism. For that I will make a stand that this bolts to and is a decent piece of steel down to a solid base. it will measure relative heights but only one or two centimetres away from an edge. In the diagram above I can attach to the 6x8 arm of my height gauge or a 10mm round bar from an indicator base. Fine I think for things like clocking a surface plate assuming it is reasonably close to spec. I need to think about balance though and might need a counter-balance on the other side of the base if I am looking at much more than 10cm.
Iain
|
| 10/11/2016 17:31:36 |
HI, Michael. Erm. Are you Dinosaur? I don't quite understand your reference to moments of inertia (other of course than the reason we watched so much poor TV before remote controls...). Stiffness and moments of inertia are quite different. For the record, I'm pretty reasonable on physics (what stiffness and moments of inertia are), but I'm a damn poor engineer (the practical bits)!
Iain |
| 09/11/2016 19:13:58 |
Hey, John. Thanks for the link. I'm looking to make my own base, though this thread has made me think more broadly about what I want rather than the bits individually. I bought a 600 x 450 glass plate to act as a lapping plate / surface plate on the expectation that it would be flat. It's not and the large scale tolerance for glass plate turns out to be quite large. It turns out the a colleague of mine is an ex glass QC manager... So I want to make use of something I've spent 50 quid on even at great personal effort. What? Who said, 'Yorkshireman'? The the link is useful and may fit into a mad idea of mine in future. Dinosaur - thanks for the info. I hadn't realised the ratio was so large.
Iain |
| 08/11/2016 21:34:12 |
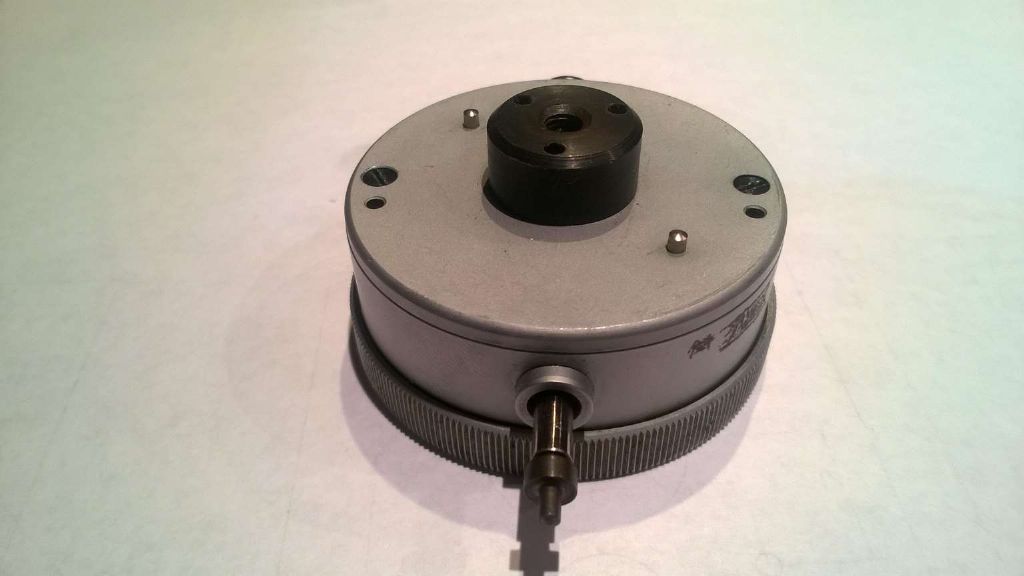
I'll double check for tapped holes, but I don't think so.The main fixing appears to be an M5 bolt going into the centre round lug. If there are it would make the task easier I'm intending to use if for surface plate measurements not lathe measurements. If I got within a though on my lathe I would be ecstatic! Tasks that are in it;s near future include checking out my surface plate (which appears to be a few tenths in one quadrant), getting the to flat of my prism spot on parallel with the base and flattening a piece of plate glass a bought to act as a lapping plate only to discover that optically good and flat are different things. I can probably get the weight of a steel mount down to 150gms and an ally version down to 70 gms maybe? Oh = there seems to be a tradition on not naming ebay in posts. I don't know why. I was being ironic... I'll post a picture when I'm finished (which will likely not be soon) Thanks
Iain |
| 08/11/2016 07:30:39 |
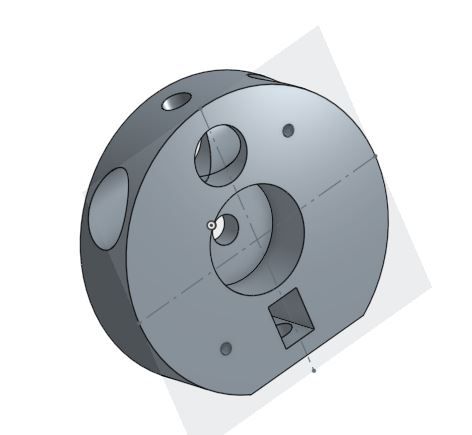
I've acquired a Geneve Micron indicator from the auction-site-which-may-not-be-named. My other indicators have various mounting lugs non of which are like the above. So I want to create a mount which will take a 6x8 bar from my height gauge or a 10mm rod from a standard magnetic mount. My problem (if it is a problem) is that this thing is heavy. It weights 250gms - half a pound in old money. I'm thinking I can make the mount in aluminium or steel. Essentially, I'll take a cylinder about 50mm in diameter and 15mm deep and bore recesses and cut holes as appropriate. If I make it in steel it will be heavy which may cause droop on whatever it is mounted on. If I make it in ally it will be much lighter, but will it be stiff enough to support the indicator in rods and bars? Or am I worrying over nothing? I can ameliorate the steel weight by milling out the areas around the holes and so on, but this in turn may reduce the stiffness - and will double the time to make the thing. Your usual excellent (and sometimes unexpected) advice is antipated!
Iain |
| Thread: The Workshop Progress Thread (2016) |
| 06/11/2016 13:25:59 |
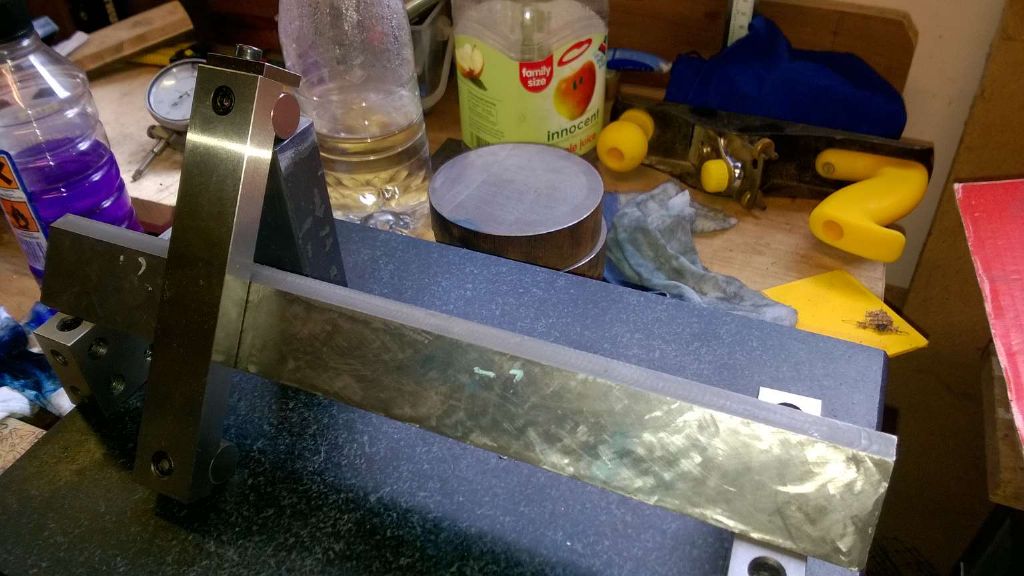
After months of stumblings, I've finally done something constructive enough to post on here! Following advice in another thread, I've invested in a sine bar to check the angle of my prism. A back of the spreadsheet calculation showed that the height needed to be 104.03mm. So I've milled, filed and scraped a piece of steel to be 104.03 mm as the riser for the sine bar. That is assuming my height gauge is accurate, which I can't check. Actually, the top varies by +0.01 / -0.02 mm or so, but for something made with my own fair hands I regard this as the ultimate in precision! That would put the angle out by something like 2% of a degree. Far better than I can work to! Next step is to actually check and correct the angle. Well next but one; I'm still working on getting the base flat. I currently on scrape 180 and counting. I expect I'm doing something wrong for it to take so much work, but no doubt I'll get there! Next time I try something like this I'll try and find a bit of cast. scraping mild steel is rather more difficult.
Iain |
| Thread: Defunct Hard drives |
| 05/11/2016 19:27:17 |
Steve - it;s quite implausible that you can get a complex piece of electronics bought and delivered from the other side of the world for less then the cost of a stamp. I had to buy! I got two on the grounds that I usually manage to blow one up before I get something working. I couldn't buy a pint for that. Thanks for all the other ideas. Apart from Clive's. I have no garden hence no crows
Iain |
| 05/11/2016 17:59:38 |
How do you get the bearings out? Is it just a press fit? Can you get it out wiht a vice and some spaces or does it need more tender care? I have the impression that the motor is integral to the case, but I've not followed that up yet.
Iain |
| 04/11/2016 18:31:45 |
I have a box full of failed hard drives, which I've just got round to sorting out. Having taken one (mainly) apart, there are clearly some finely machined bits in it. flat disks, magnets. Motors. Are they of any practical use? Can I get bearings out? what can I do with a dead flat small round thing with a hole in the middle? From what I can see the drive motor (7200rpm) is built in so I can't easily extract it and do anything useful with it, but it may have useful bearings. Or do I just bin the bits? Any (publishable) suggestions welcome!
Iain Edited By Iain Downs on 04/11/2016 18:39:04 |
| Thread: Accurate angle on a scraped prism |
| 31/10/2016 22:24:40 |
HI, SteveI. I'm not sure I understood your explanation either. I think it is based around the potential problem that the prism can end up with the sharp bit in the recess at the corner of the dovetail, which can cause it to tilt. Since it may well tilt anyway, it can't provide an accurate reference angle so you are better off with a narrower wedge which clearly won't be tilted like this. What I'm not clear about is how one then gets the dovetail angle accurate. I appreciate that you scrape a dovetail against a straight edge and the use that to blue up the mating dovetail, but surely one wants the angle to be as close to a target dovetail as possible. Neil and others - I see that there are schemes with cylinders which will do the job. Before reading the more recent posts I went and ordered a sine bar. so I'll probably try this way first., Yet another exciting tool to use once and put away Iain
|
| 30/10/2016 21:01:21 |
HI, Tony. The spreadsheet just saves me typing in to a calculator. nothing clever. Chris - I'm in Harrogate which is just a bit too far from Staffordshire. Happy to pay postage and a sensible price, though if you have something I can use. ping me an IM...
Martin - I don't really need an exact angle for the reasons you've indicated. However, I think there may be some drift along the bar. But the more important reason is I just want it to be right! I appear to have found a fascination with the scraping side of life and I want to see if I can make something with that level of precision.... Clearly insane...
Iain |
| 30/10/2016 17:49:12 |
hi, not done it yet. the maths isn't the issue for me (I've used maths at work for a long time and am helping no. 1 son with Maths A level). I would need to measure the X distance between the two points to a high level of accuracy and then the heights. I don't have a registration point for the x distance which makes it hard to get this accurate. I'd need to intersect the prism face (say) at 2mm height and use that as a registration and then have my indicator (say 15mm further in) get the height. the issue is (mainly?) getting the distance from the registration point to the indicator. apart from the indicator having a ball on the end (bit more maths), it is not designed to be rigid side to side,
Iain |
| 30/10/2016 16:18:14 |
Actually, BikePete, that makes a lot of sense. I'd been thinking about how to measure horizontal and vertical accurately which was throwing me. The sine bar allows me (in theory) to set up the target angle and either measure the distance top and bottom or blue. Also, sine bars appear on our favourite auction site at not ridiculous prices. Thanks
Iain |
| 30/10/2016 13:04:07 |
I'm in the process of making an accurate 55 degree prism, partly for the purposes of trimming up my micro mill dovetails, but mainly for the fun of it. I've got the two surfaces scraped to the point where they are reasonably flat, but nowhere near bearing quality. Before I put the finishing touches on it I want to get the angle accurate. I have a Lidl angle measuring tool which reckons it's a 0.1 / 0.2 degrees out, but it's quite hard to take an accurate measurement. to be fair 0.1 degree out is more than adequate for the micro mill, but I'm treating this as an exercise is precision to see what I can overcome my natural hamfistedness. According to my back of an excel spreadsheet calculations, if I take a point 15mm in from the sharp bit, at 55 degrees it should be 21.422mm high. at 54.9 degrees it is .08mm (3 thou) lower and at 54.8 degrees .16mm lower. Of course the edge is not knife sharp (I've softened it, to stop chipping) and I'm not sure how I would measure from it in any case. I've found references that tell me how to get a 45 prism spot on (it's a variant of the whitworth 3 plate approach), but I'm not sure how to do other angles. Thanks
Iain |
| Thread: Lump in Lathe MT3 Spindle |
| 28/10/2016 21:52:47 |
My supplier (SPG Tools) tells me that they don't supply spindles and that the run out I'm seeing is normal for this type of lathe. ARC tell me that they don't supply a compatible spindle. So it seems I'm left with making the best of what I have. which is fine. Apart from the run out, the headstock is not in line with the bed at all (~0.5mm out at 200mm, accounting for run out) so I shall have a go at tweaking that out, perhaps skim the faces of the chuck plate and reskim the end of my soft centre. Thanks for the advice and help.
Iain |
| 27/10/2016 18:21:17 |
Hopper. I had in mind the oven for re-assembly. warm the front bearing and put it on the spindle. Let it cool. head the headstock. Assemble the spindle from the front. then press the rear bearing in from the rear using something turned to extend across the full width of the bearing (less the hole in the middle).. I actually managed this on the rear bearing in re-assembly and this worked reasonably well. With a bit of luck that's got all my bearings on without resorting to a hammer. I imagine the next step is to let it cool and then preload the bearing. Blowtorching the headstock may be a useful way of making the extraction easier. If I ever get round to it! As and when and if I might measure the spindle diameter and headstock retainer (if that's the word) and see how for out of fit they are. I might have done that when I had the issue, but have no recollection of the result. Iain |
| 27/10/2016 06:34:27 |
Thanks Hopper. With the soft centre, I'v marked position on the chuck plate and the centre so that i can re-assemble in the same orientation each time (after an initial skimming) which means (I hope!) that I don't have to re-skim for each job. The headstock adjustment is basically tightening up the securing bolts more or less so it's a bit of a blunt instrument. I will most likely use Rollie's Dad's as a starter because it's quick. Depending on results I may end up tuning with a test bar. Most likely I will leave any spindle / bearing replacements for now, though I will have a try at aligning the headstock. In particular if it's too far vertically from the tailstock it makes centre turning pointless. If I'm going to replace the bearings / spindle then I most likely don't care how hard it is to get out. I did have in mind to put the headstock in the oven (cook for one hour at 120...) to warm it up, rather than a blowtorch as 1) it should give more even heat and less stress and 2) I don't have a blowtorch. Iain |
Want the latest issue of Model Engineer or Model Engineers' Workshop? Use our magazine locator links to find your nearest stockist!
Sign up to our newsletter and get a free digital issue.
You can unsubscribe at anytime. View our privacy policy at www.mortons.co.uk/privacy
- *Oct 2023: FORUM MIGRATION TIMELINE*
05/10/2023 07:57:11 - Making ER11 collet chuck
05/10/2023 07:56:24 - What did you do today? 2023
05/10/2023 07:25:01 - Orrery
05/10/2023 06:00:41 - Wera hand-tools
05/10/2023 05:47:07 - New member
05/10/2023 04:40:11 - Problems with external pot on at1 vfd
05/10/2023 00:06:32 - Drain plug
04/10/2023 23:36:17 - digi phase converter for 10 machines.....
04/10/2023 23:13:48 - Winter Storage Of Locomotives
04/10/2023 21:02:11 - More Latest Posts...
- View All Topics
- Reeves** - Rebuilt Royal Scot by Martin Evans
by John Broughton
£300.00 - BRITANNIA 5" GAUGE James Perrier
by Jon Seabright 1
£2,500.00 - Drill Grinder - for restoration
by Nigel Graham 2
£0.00 - WARCO WM18 MILLING MACHINE
by Alex Chudley
£1,200.00 - MYFORD SUPER 7 LATHE
by Alex Chudley
£2,000.00 - More "For Sale" Ads...
- D1-3 backplate
by Michael Horley
Price Not Specified - fixed steady for a Colchester bantam mark1 800
by George Jervis
Price Not Specified - lbsc pansy
by JACK SIDEBOTHAM
Price Not Specified - Pratt Burnerd multifit chuck key.
by Tim Riome
Price Not Specified - BANDSAW BLADE WELDER
by HUGH
Price Not Specified - More "Wanted" Ads...
Do you want to contact the Model Engineer and Model Engineers' Workshop team?
You can contact us by phone, mail or email about the magazines including becoming a contributor, submitting reader's letters or making queries about articles. You can also get in touch about this website, advertising or other general issues.
Click THIS LINK for full contact details.
For subscription issues please see THIS LINK.
Model Engineer Magazine
- Percival Marshall
- M.E. History
- LittleLEC
- M.E. Clock
ME Workshop
- An Adcock
- & Shipley
- Horizontal
- Mill
Subscribe Now
- Great savings
- Delivered to your door
Pre-order your copy!
- Delivered to your doorstep!
- Free UK delivery!
 .
.


 Register
 Log-in


