Member postings for Larry Coleman 1
Here is a list of all the postings Larry Coleman 1 has made in our forums. Click on a thread name to jump to the thread.
| Thread: Forgotten engineering techniques |
| 23/01/2015 11:21:06 |
Hey Bob I must apologize. I made a mistake you were not the person I was aiming for. Sorry Bob.Please accept my apologies. That comment was aimed at the person winging not you. Larry Edited By Larry Coleman 1 on 23/01/2015 11:26:57 Edited By Larry Coleman 1 on 23/01/2015 11:39:07 |
| Thread: Little Tich |
| 23/01/2015 09:54:59 |
PDBV I think what you have done in two weeks looks real good. I am building 'Juliet' the five inch gauge. What diameter is your boiler drum. I am also going to try and fit self aligning bearings, The bronze ones thats why I asked about how much movment your axle boxes had. Can any one tell me if you get axle lock up or are the axles rigid the drawing I have is very vage. Ian I have opened up an album and have 64 pictures in it how do you open a second one. Your help would be appreciated. Larry |
| Thread: Forgotten engineering techniques |
| 23/01/2015 05:33:03 |
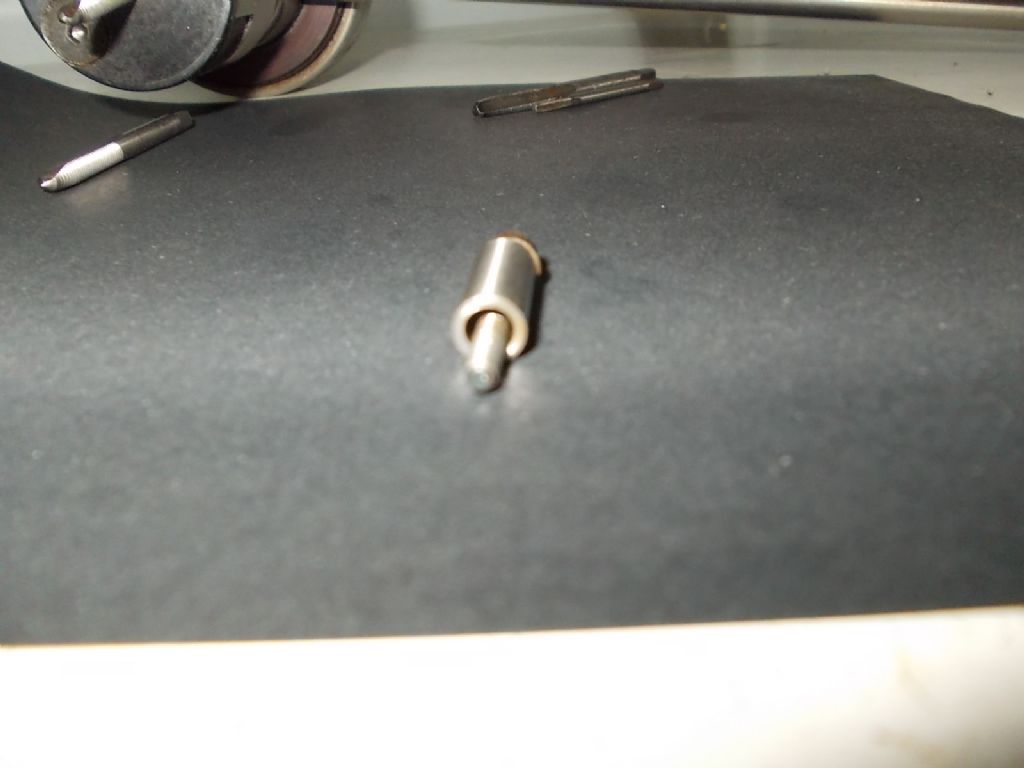
The attached picture is a tapping head for a drill press. All the taps used in them were gun taps.
|
| 23/01/2015 04:58:28 |
Now getting back to what I was saying before. With small hole taps try and get Gun taps. They only have two flutes and when used for hand tapping you can not beat them. Must use tapping compound for best result. They are a little bit more expensive but its worth it. These taps are intended for use in tapping heads used in a drill press. Larry
|
| 23/01/2015 04:46:31 |
|
Edited By Larry Coleman 1 on 23/01/2015 04:47:49 |
| 23/01/2015 04:04:33 |
Good description John How those toolmakers buttons came about is a lot of small tool rooms did not have access to a machine called a jig borer and when you make what is called a follow on die or a die which has say five stages before a component is completed the accuracy between stages are very important. Because the strip progressed by what is called a crop stop or a pilot punch if the second hole is .001" out it is then multiplied x 4 at the final punch process. So you have to be able to at least get those holes within .0001" and you can not mark out Centre punch and drill to that accuracy. The die block is then ground square and you choose an X & Y position. After marking it out with a height gauge you centre pop each hole position and drill & tap for the button screws. Each button has about .060" of movement and is a miniature cylinder square so you measure from the X side minus half the button diameter and then from the Y side minus half the button diameter. Then you place the die plate in the chuck and dial the front face rotating true. Then you dial up the button until it runs true then you check the plate face to check its still true. You repeat that process for each hole always measuring from the X & Y. On most occasions you measured with a depth micrometer so your hole can be within .0001" Now I earlier brought up the cylinder square because the toolmakers buttons are miniature cylinder squares. Help me out here John is that to complicated ? I will come up with some pictures shortly. Larry
Edited By Larry Coleman 1 on 23/01/2015 04:06:32 |
| 22/01/2015 14:35:41 |
Bob Personally Bob your the one who has deemed conversation and interjection Banter which I believe is human nature. Now heres a bit more banter for you. If you don't like what you are reading don't read it. Your the one that needs to apologize. See you!!!!! Larry
|
| 21/01/2015 22:23:03 |
Well said John But I think you have to understand whats happening here. Its called "Intellectual Jousting". This is sometimes practised to belittle people thus protecting their superority and is very previlent in clubs which I avoid. I'm not affended. Larry |
| Thread: Little Tich |
| 21/01/2015 12:53:28 |
Hey Pete I am in the process of building 5" version of that loco. How much vertical movement do you have on your axle boxes. Have you finished the boiler. Larry |
| Thread: Forgotten engineering techniques |
| 21/01/2015 12:36:52 |
Bob Those old books you have should be delivered to your local library or museum if you have no use for them so please do not dump them. At least if you ever want to read them you can get access to them. Larry |
| Thread: Lister Diesel Engine |
| 19/01/2015 15:52:01 |
Eric What I am trying to do is use what I have here at my place. yes I can buy all the special additives but I am looking for somthing cheap. Poor pensioner here. I have poured lead in pure Plaster but I an wondering if brass may be a bit hot. I can get plenty of clay in a creek which was used for making bricks for a copper smelter in the 1800's. I think I will just have to experiment. Larry |
| 19/01/2015 15:39:36 |
Stevetee Well you believe what ever turns you on, but the process of burying engine castings in the ground was passed on to me by an engineer at De Havilands, Gorden who's father built the spitfire aircraft and I remember seeing a picture of the ground with white posts marking each casting. Also who said cast iron was not pourous. It definatly is and that was confirmed yesterday by an engineeer at a foundry in NSW. And lets not be silly it does not have one eigth holes in it. Its microscopic. Larry Edited By Larry Coleman 1 on 19/01/2015 15:43:31 |
| 19/01/2015 15:27:14 |
Neil I would imagine those silver bearings would have a steel backing plate but the person from the Australian Museam told me they were solid silver. I don't know because I have never seen one. Larry |
| 19/01/2015 15:20:12 |
Eric You have done a first class job on those parts. Do you pour the castings yourself. Have you had much experiance with casting sand for the molds. I am building a furnace here on my property and I have never made a sand mold before. I also have access to deadburned magnesia dust because I worked as a fitter in the process plant. I was thinking if I mix plaster of paris with that magnesia dust I wonder if I could pour brass and aluminium in them without an explosion. Naturally they would be dryed first. What do you think.? Larry Edited By Larry Coleman 1 on 19/01/2015 15:22:12 |
| Thread: Forgotten engineering techniques |
| 19/01/2015 10:32:47 |
Julian In regards to my prop shaft anecdotes I would like to talk to Sid and find out how they did it in the WW2 days. I do know that some shafts were put into the big lathes and were trued up using a type of tool post grinder. Have a think about what we were dealing with. A long heavy shaft which could sag due to its weight. Now I am only talking about twenty thou sag. So you put one end in a four jaw chuck and get it true. The other end needs a centre hole put in it so you place that end in a roller fixed steady and put in the centre hole. Now you have a problem. You have a long shaft with one end in the four jaw chuck and the other end supported by the tail stock. When you rotate the shaft SLOWLY it runs out of true. The problem: You have a four inch solid shaft between a chuck and centre that is running out by about twenty thou and you have to get it within .002 to meet Navy specs. Ok my critics tell me how you would do it? All I can tell you is how it was done at NQEA and thats a fact. Also those Fremantle class patrol boats were designed in the UK and were twelve ton to heavy in the stern and were redesigned by the NQEA owner Don Fry a very experianced engineer. The last time I spoke to Don he was working on the scram jet project. Any way if you dought that the process I discribed does not work tell me how you would do it. Larry Edited By Larry Coleman 1 on 19/01/2015 10:36:10 |
| 18/01/2015 23:06:47 |
Well I have only done one real big shaft when I was working at Garden Island for the HMAS Supply. It was straitened with heat as I described. It was twelve inch in dia and Sixteen feet long. The heat applied was proportional to the dia of the shaft. That is common sence. If you didn't use that process how do you think you would do it? Remember a big shaft could weigh in at 3 to 4 ton. By the way Bob where did you do your trade. Jason would't they let you on board, maybe stowage was full. Larry |
| 18/01/2015 15:37:40 |
Typo error. 220 Tons not 2000. Larry Edited By Larry Coleman 1 on 18/01/2015 15:38:20 |
| Thread: Lathe Size |
| 18/01/2015 15:06:07 |
|
| 18/01/2015 15:02:04 |
Bazyle I see your point but not every one fits your requirements. When I was importing machinery from china I had access to small lathes at very cheep prices but I refused to sell jewllers lathes and to top that off I imported vertical mills similar to the Bridgeport but with improvements. The first vertical mill that size that could operate on 240v single phase.I tried to sell them for $5600 au. A bloke rang me and asked what was wrong with them. I said nothing they are brand new machines I then offered it to him for $25,000 which other equivilent 415v machines were selling for and he said I could not afford that. And I said well thats what is wrong with them. It took me two years to sell them and I landed them in Oz for $5000 each. I am starting a 5" Garret soon 4442 and my lathes will suite making that model. But I don't know what I will do next. So I have found that when buying your first lathe make it a decent size machine and for a working man buy it through finance. In regards to speed my machines have back gears and the next low speed would be stopped. No don't match your lathe with your car because usually your car would be buggered. I have just up graded to a toyota Camry station wagon V6 which will pull a duel axle 2 ton trailer. When I bought my first lathe I was driving a Morris 1000 sedan which was a great little car but my lathe I got was top notch. I don't follow you at all about the screw cutting box I cut those threads all the time on my lathe. It all about TPI and a different tool angle. Power cross feed is esential when facing large dia plates. Regards Larry
|
| Thread: Forgotten engineering techniques |
| 18/01/2015 14:09:45 |
Jason When you machine the tapers you remove a lot of metal and it releases tensions on the end of the shaft. The reason they where straitened twice was to ensure the tapers run true to the shaft. And yes they were that delicate due to there weight we used special lifting spreader bars and delivery jigs. The patrol boat shafts had to be inserted into the boats by Navy approved fitters. Now have you ever been on a large ship and felt a distinct thump while under way. There can be two reasons for that: The shaft is bent or the propeller has not been scraped in properly. When the prop is scrapped it is fitted to the shaft in a special jig and rotated to check that each blade tip tracks on the same radius. The pitch is measured in roughly for sections of each blade. It is then balanced and all the exposed shaft not in the bearings were wrapped in fibre glass matting and sprayed with resin and hardener. The shafts were rated for 900 revs. The diesels reved out to about 1500 rpm with gear reduction to the shaft. The biggest ship I fitted was 25,000 ton and the prop was 12 ton. The patrol boats were 2000 ton. Larry |


Magazine Locator
Want the latest issue of Model Engineer or Model Engineers' Workshop? Use our magazine locator links to find your nearest stockist!
Sign up to our Newsletter
Sign up to our newsletter and get a free digital issue.
You can unsubscribe at anytime. View our privacy policy at www.mortons.co.uk/privacy
Latest Forum Posts
- *Oct 2023: FORUM MIGRATION TIMELINE*
05/10/2023 07:57:11 - Making ER11 collet chuck
05/10/2023 07:56:24 - What did you do today? 2023
05/10/2023 07:25:01 - Orrery
05/10/2023 06:00:41 - Wera hand-tools
05/10/2023 05:47:07 - New member
05/10/2023 04:40:11 - Problems with external pot on at1 vfd
05/10/2023 00:06:32 - Drain plug
04/10/2023 23:36:17 - digi phase converter for 10 machines.....
04/10/2023 23:13:48 - Winter Storage Of Locomotives
04/10/2023 21:02:11 - More Latest Posts...
- View All Topics
Support Our Partners


Shopping Partners
Subscription Offer

Latest "For Sale" Ads
- Reeves** - Rebuilt Royal Scot by Martin Evans
by John Broughton
£300.00 - BRITANNIA 5" GAUGE James Perrier
by Jon Seabright 1
£2,500.00 - Drill Grinder - for restoration
by Nigel Graham 2
£0.00 - WARCO WM18 MILLING MACHINE
by Alex Chudley
£1,200.00 - MYFORD SUPER 7 LATHE
by Alex Chudley
£2,000.00 - More "For Sale" Ads...
Latest "Wanted" Ads
- D1-3 backplate
by Michael Horley
Price Not Specified - fixed steady for a Colchester bantam mark1 800
by George Jervis
Price Not Specified - lbsc pansy
by JACK SIDEBOTHAM
Price Not Specified - Pratt Burnerd multifit chuck key.
by Tim Riome
Price Not Specified - BANDSAW BLADE WELDER
by HUGH
Price Not Specified - More "Wanted" Ads...
Get In Touch!
Do you want to contact the Model Engineer and Model Engineers' Workshop team?
You can contact us by phone, mail or email about the magazines including becoming a contributor, submitting reader's letters or making queries about articles. You can also get in touch about this website, advertising or other general issues.
Click THIS LINK for full contact details.
For subscription issues please see THIS LINK.
Digital Back Issues


Donate

 Register
 Log-in
Model Engineer Magazine
- Percival Marshall
- M.E. History
- LittleLEC
- M.E. Clock

ME Workshop
- An Adcock
- & Shipley
- Horizontal
- Mill

Subscribe Now
- Great savings
- Delivered to your door

Pre-order your copy!
- Delivered to your doorstep!
- Free UK delivery!