Member postings for Paul Major
Here is a list of all the postings Paul Major has made in our forums. Click on a thread name to jump to the thread.
| Thread: Restoring Beaver VBRP Mill |
| 18/10/2016 13:37:51 |
Hi Alan, sorry its taken so long to respond but here are some more photos of the gear. It looks to me like it is bang on 6 inches diameter. I'm afraid I didn't have time to count the teeh but hopefully the photos are good enough that you can do that from enlarging them
Cheers,
Paul. Edited By Paul Major on 18/10/2016 13:38:37 |
| 09/10/2016 16:40:13 |
No idea where the spindle is so couldn't take a photo of that Cheers,
Paul.
|
| 08/10/2016 19:33:21 |
Glad this thread is becoming a bit of a source for VBRP info, since starting it I have pinged quite a few people copied of the manuals I have collected but not renewed the DropBox links, so great to see everyone sharing their info Mine is still in bits, but on the upside it is now in the shiny new machine shop waiting to be put back together! @Russ, when you get an idea on price for your one ping me, probably will be out of my budget but might tempt me to short cut rebuilding mine!! Cheers, Paul. |
| Thread: Centec 2A Refurb |
| 10/01/2016 12:15:44 |
Yes the lever is for a rapid traverse, but you have to unlock a half nut on the end of the leadscrew, sowhilst it traverses rapidly it takes a few mins to engage! This has a big drip tray as well, but at the moment it is filthy and just gets in the way so haven't fitted Cheers, Paul |
| 10/01/2016 10:16:49 |
So go onto cleaning it up over Christmas. Stripped the head, table, saddle and knee off and gave everything a thorough clean. Actually was in quite nice condition, you can se ethe flaking on the column which I am guessing is from manufacture
Set about clenaing all the grime off the case, pulley etc.
Was able to get the saddle and knee set up nicely with the gibs with pretty much zero play. The table has more wear in the gib so was a bit more tricky but worked out OK with a bit of tightness at full right position. If I get a chance I might get/make a new gib strip and get the table ways scrapped but not esential. Leadscrews have about 5thou backlash which doesnt seem to want to adjust out but I can live with that. And all reassembled, haven't attacked the stand yet so that is still a bit grubby
Filled the box with Lumach 100 from Alex Oils which seems to be a close match for the original Vitrea 100. Cheers, Paul. |
| 10/01/2016 10:08:31 |
Refurbing the Beaver VBRP mill has turned into a bit of a long term mission and has been delayed by building a new machine shop to house it! As a result I saw a nice Centec 2A locally at a decent price so snapped it up in the summer. This is how it was on unloading.
Reasonably solid but not been used for a while and needed a good clean. It has the fixed spindle vertical head and manual crosslide so pretty basic. It is running a single phase motor which doesn't quite have the oomph to turn the vertical head in the higher gears/speeds so may need to look at a bigger motor or converting to a VFD and small 3 phase for extra torque. Paul.
Edited By Paul Major on 10/01/2016 10:08:53 |
| Thread: Restoring Beaver VBRP Mill |
| 22/10/2015 11:56:53 |
Thats where collecting old spanners and tools at boot fairs comes in Edited By Paul Major on 22/10/2015 11:57:05 |
| 21/10/2015 13:52:55 |
Hi Josh, still a work in progress! It is fully stripped but not rebuilt yet, if you PM me an e-mail address I have an PDF manual I can send over. Cheers, Paul. |
| Thread: Help required re: centec 2b motor replacement |
| 13/10/2015 20:37:14 |
Hi Peter. Not sure if you still pop in here but I have a Centec 2a as well, and a 1.5hp single phase motor I want to wire up. Also have the barrel switch, just wondered if you ever wrote up the instructions? Also need to change the vertical head spindle bearings if you ever went near these? Cheers, Paul. |
| Thread: Base for a new machine shop aka "shed"! |
| 03/05/2014 21:59:39 |
Thanks for all the info Bill and everyone Had a friend who is a QS come round to give some advce on the structure and he also suggested that by the time I have faffed about trying to implement alternatives it will be quicker and no more expensive to get a truck load of pre mix in. So, plan is to hardcore, 50mm sand blind, dpc, kingspan then 150mm C30 with mesh. May run it a bit thinner in the store and woodwork parts of the shed to keep it to 1 load. Hopefully get this sorted in the next 4 weeks so will let you know how I get on! Cheers, Paul. |
| 27/04/2014 22:54:55 |
Getting closer with his now. Old shed is stripped out to frame. Has a concrete pad laid around outside and across middle to support the wooden floor joist many of which have rotted out Was planning to pour a 150mm slab inside the perimeter until I worked out that at 9m x 5m a 150mm slab is near 7 cu m. Then looked at the price of ready mix and fell over. With that and the osb for walls, kingspan for insulation and box section roofing looking at £2k for a shed Need to find lots of seconds/or used kingspan and roofing. Not sure what to do on floor yet, might just drop in pads for the area the machines are going in. Thoughts...... Cheers, Paul. |
| Thread: Restoring Beaver VBRP Mill |
| 21/03/2014 22:45:31 |
Thanks Harry, here are links to two I have found, https://dl.dropboxusercontent.com/u/73721422/Beaver%20Mill%20Mk2.pdf https://dl.dropboxusercontent.com/u/73721422/beaver%20mk2.pdf Cheers, Paul. |
| Thread: electrolysis for rust removal- carbon plates |
| 14/03/2014 08:07:13 |
Thanks guys, very informative. I have a couple of 25l drums made of thin steel/tin that the solvent for the parts washer came in. Plan now is to cut off top and bottom and drop into a plastic drum as the anode. Means the anode will suround the items to be cleaned. Cheers.
Paul. |
| 12/03/2014 19:41:34 |
@ Tim - and sorry to the OP, not rying to hijack your post Probably a really dumb question, but if the attack on the anode metal isn't that severe, why don't people use a tin drum as the container and this doubles as the anode - genuine question, not trying to be a smart ass Cheers, Paul |
| Thread: Restoring Beaver VBRP Mill |
| 09/03/2014 20:02:51 |
Hi Harry, material just looks like normal brake lining, probably softer than on a automotive brake, beyond that can't really tell. Any idea how to attached/upload stuff? Cheers, Paul. |
| 08/03/2014 21:59:59 |
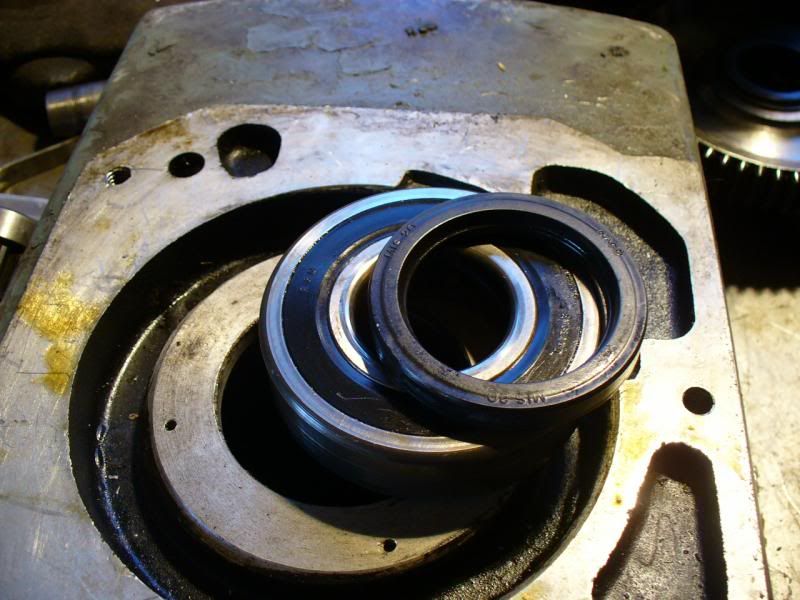
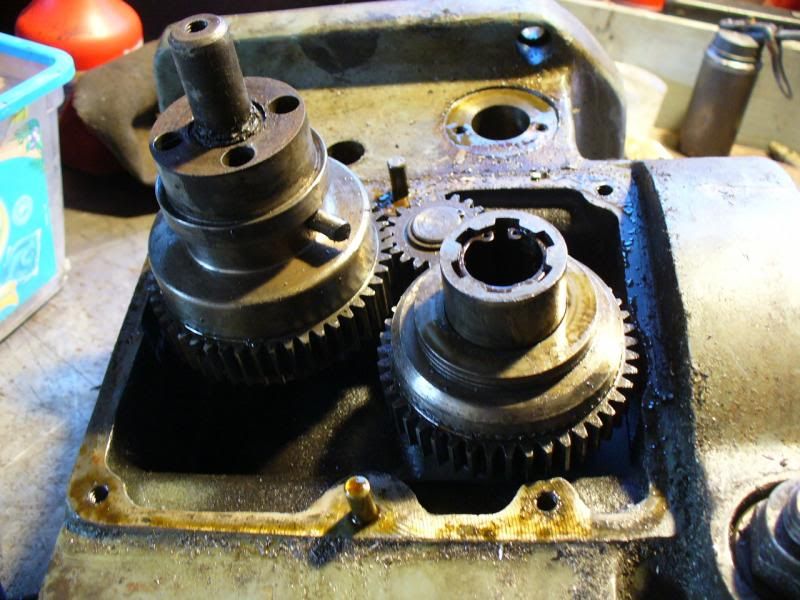
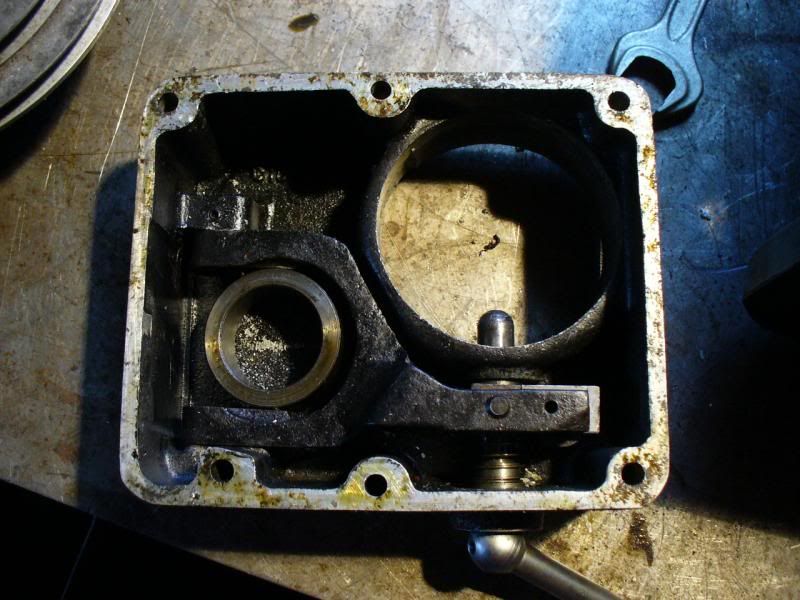
OK, back on track. Walked over the shed with the casing and pressend out the main bottom bearing.
There is a thin circular plate held on by 4 tiny screws that has to come off first. The bearing and seal is oriented like this.
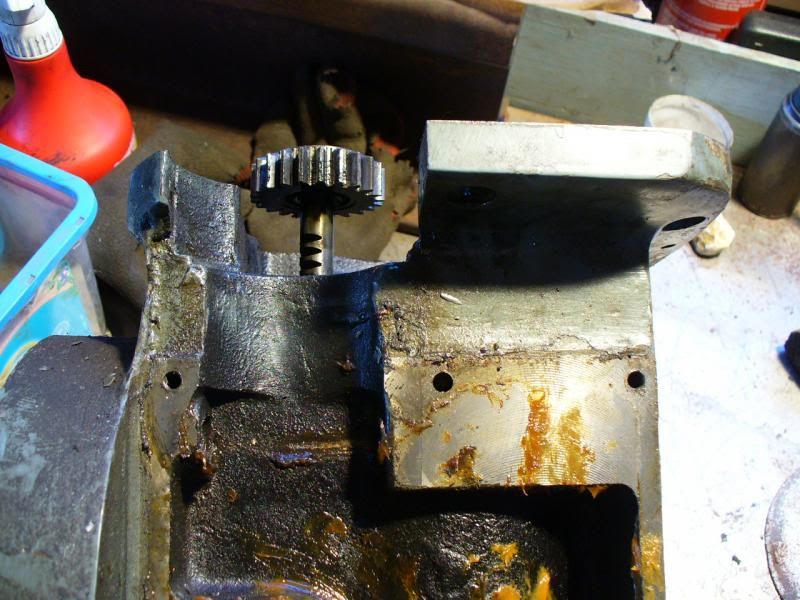
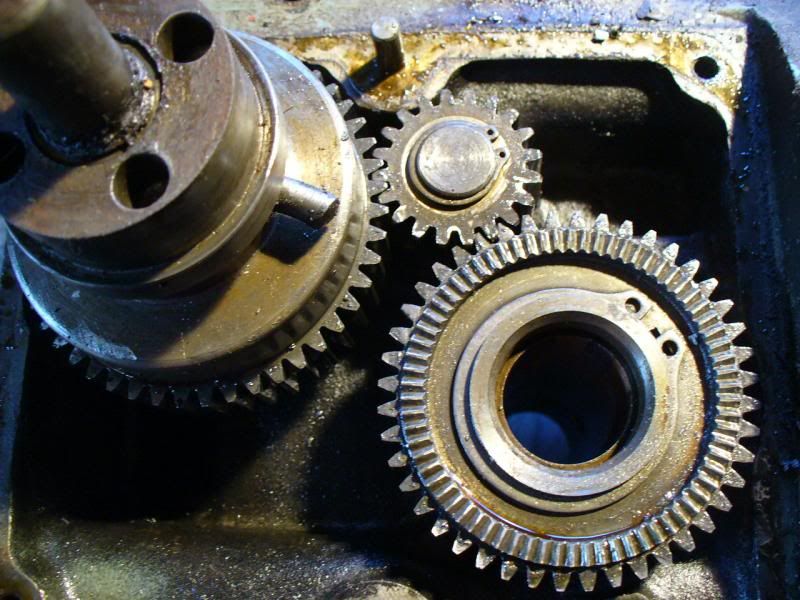
Then moved onto striping the bottom section of the head, starting with what I think is the idler gear.
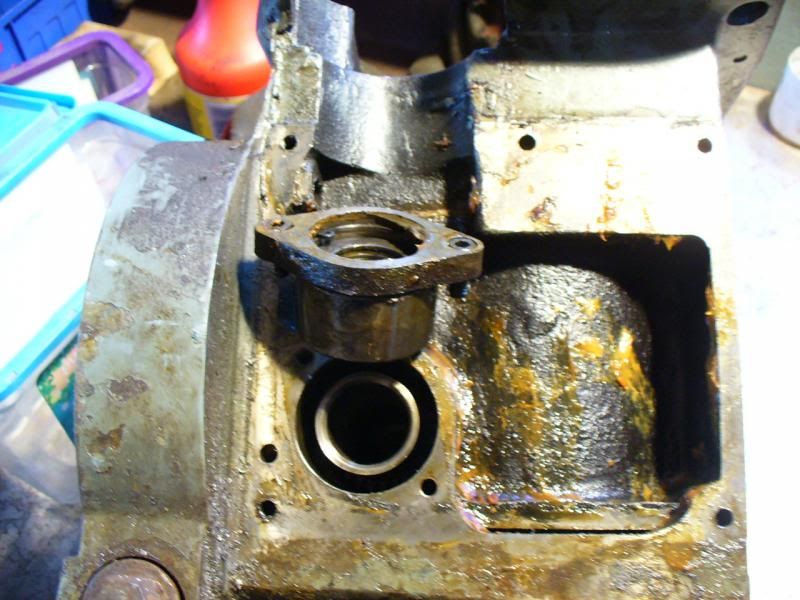
Then the bushing that the pinion shaft sits in (IIRC
And the feed disengagement shaft/pinion
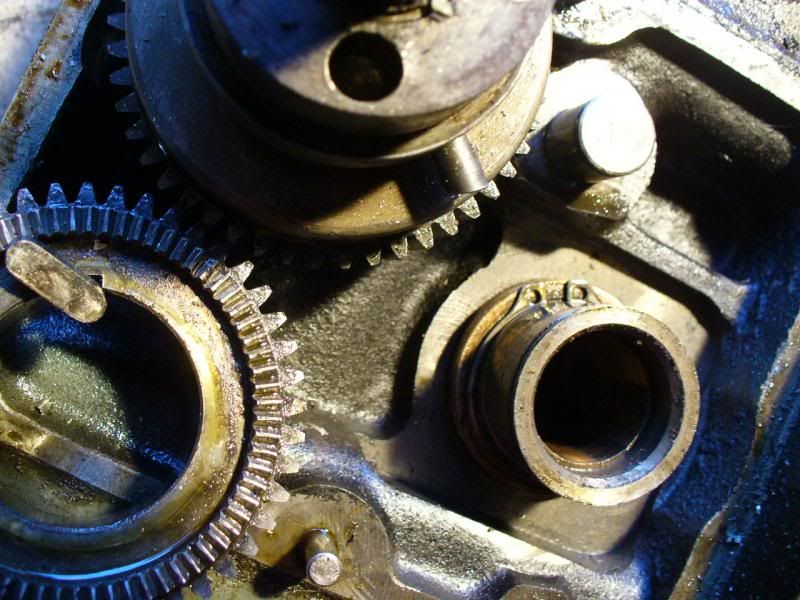
Removed the clutch box cover
Close up view showing location of circlips and pins
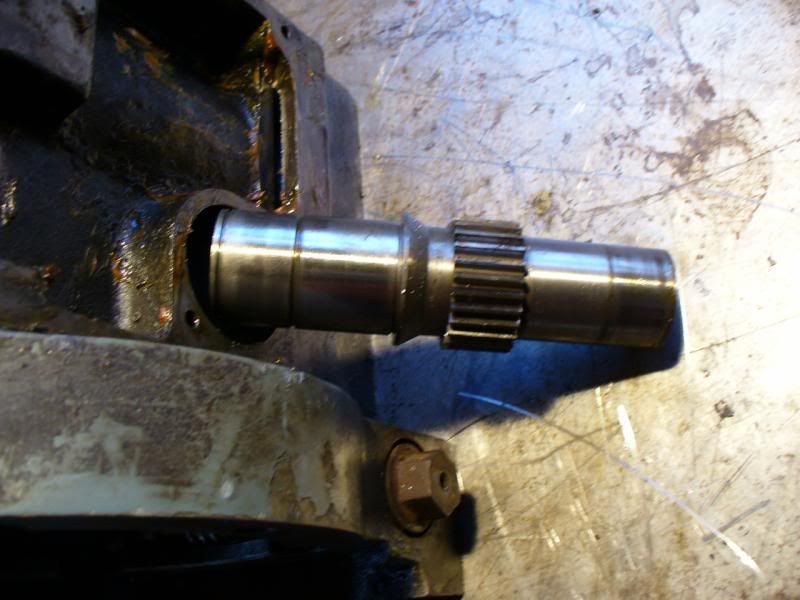
Removing the gear from the pinion shaft
Revealing another circlip on the shaft itself, hence why you wouldn't be able to remove the shaft without coming in from the clutch end.
Shaft removed
View inside the clutch cover showing how the clutch lever is located
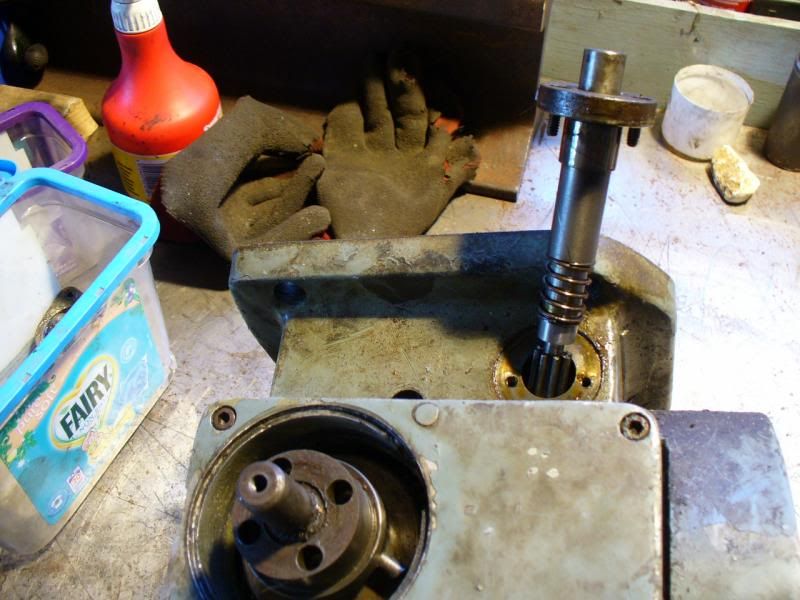
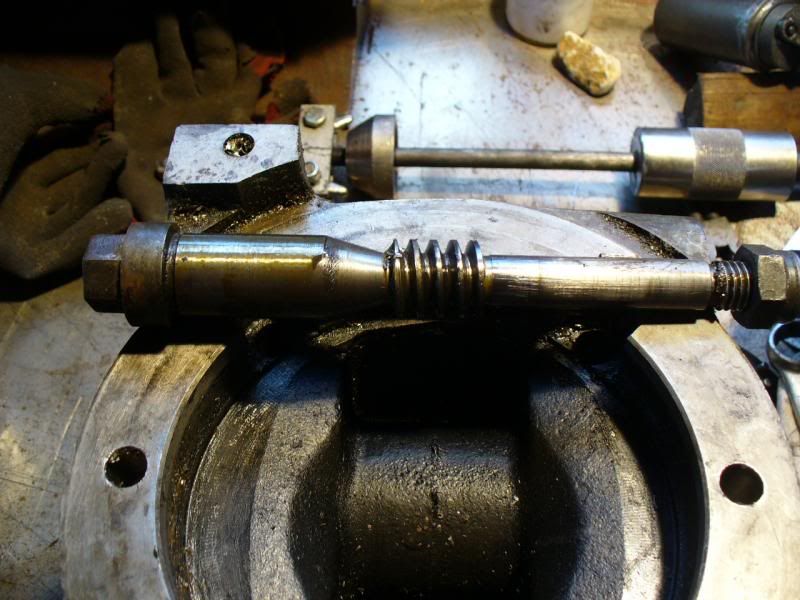
And finally, removed the worm shaft from the head/overarm
Thats the head pretty much stripped now. Might move onto cleaning, painting and stuff like that next so I can get some of this re-assembled before I loose any parts or forget how they go together Cheers, Paul. |
| 08/03/2014 21:31:16 |
Harry, couple of thoughts on re-reading your post. The quill spring didn't unwind significantly when removed. When I first removed the the quill I had to "unwind" the spring by holding the lever and gently rotating it. There is a warning in the manual to do this carefully as the tension on the spring could cause the lever to spin rapidly. Once I had the tensio off I did no further dissasembly on the spring mechanism as it looked like a clock spring that once undone would be a bugger to re-assemble! On removing the collar on the y axis, pay special attention to having removed the various cotter pins and grub screws, there are some detailed pics earlier in the thread. Mine had a couple of "hidden" grub screws, one under the mic locking ball bearing. Cheers, Paul.
|
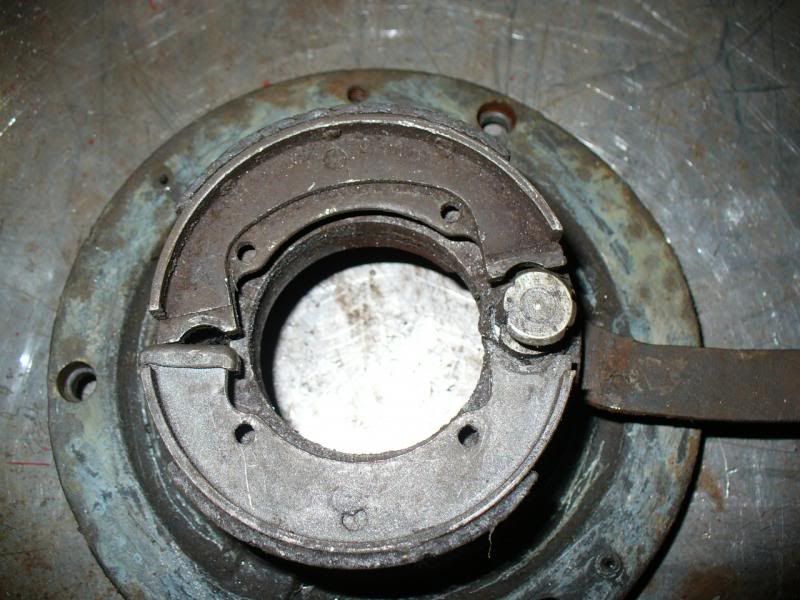
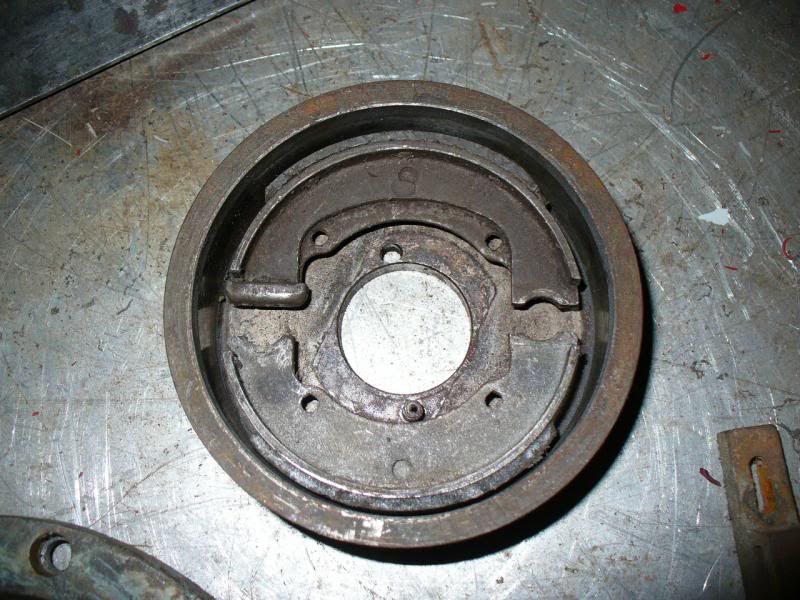
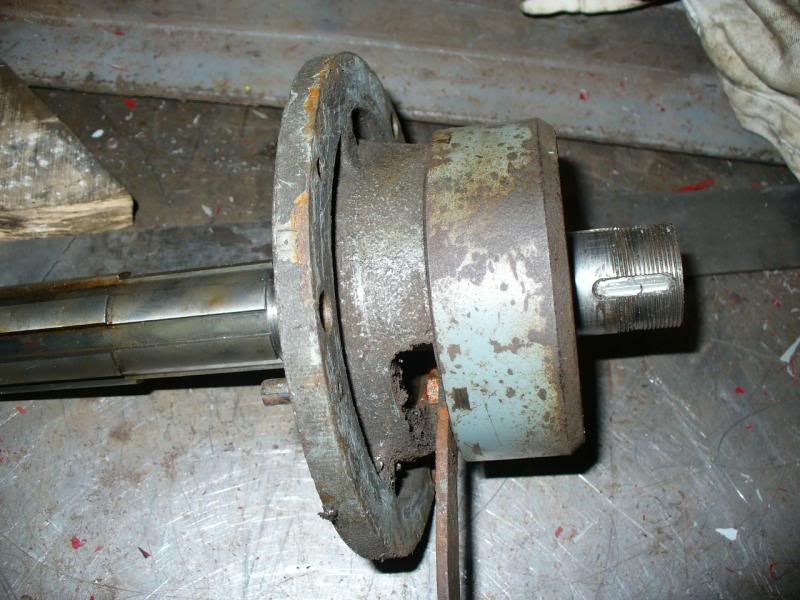
| 08/03/2014 21:20:12 |
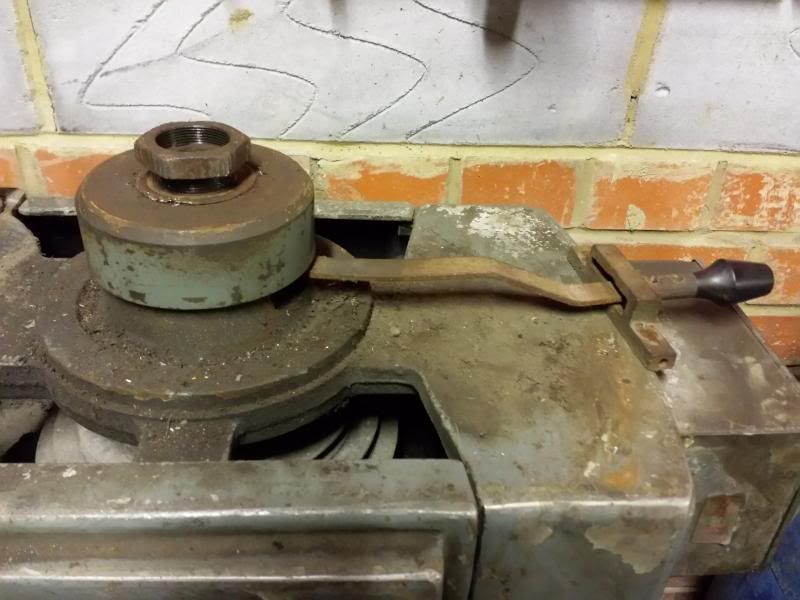
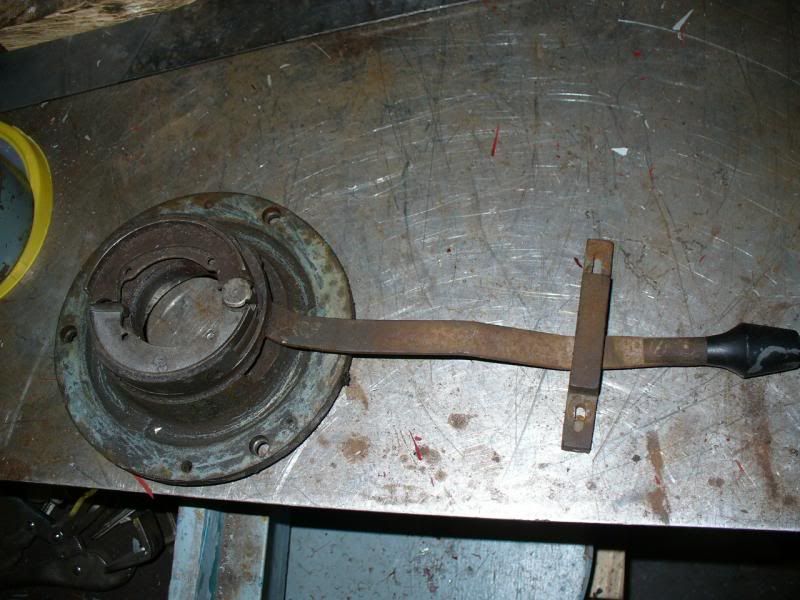
Hey Harry, info on spindle brake as promised. The brake sits on top of the pulley housing and acts on the top of the spindle.
The lever operates a set of expanding shoes via a cam on the end of the lever
The brake shoes act on the inside of a drum
and when it is all assembled the drum sits kinda like this
So the drum is locked to the spindle and rotates and when the lever is pushed over the shoes expand onto the drum and hence brake the spindle. Hope that makes sense Cheers, Paul.
Edited By Paul Major on 08/03/2014 21:22:38 |
| 08/03/2014 08:53:06 |
Hey Harry/Dan some other Beavers - whoohoo I found very sporadic information on these when i started this journey despite many comments saying these mills were much better then the morw popular Bridgeport. Thats why I started this thread as I hoped it would attract/act as a resource for future Beaver owners. On the spindle brake, I will go take a few photos later today hopefully. I haven't actually checked what threads are on mine yet, doesn't matter when all younare doing is taking them apart Not sure if the leadscrews are hardened, how would you check? The user manual I have is about 55 pages, if your is 100 pages then it would be great if you could post up as it will increase the general,pool of info. Been busy withnwork last few weeks so haven't had a chance to progress the build but will try and add some more stuff this weekend. Cheers, Paul. |
| Thread: Making tools for shaper |
| 19/02/2014 20:36:23 |
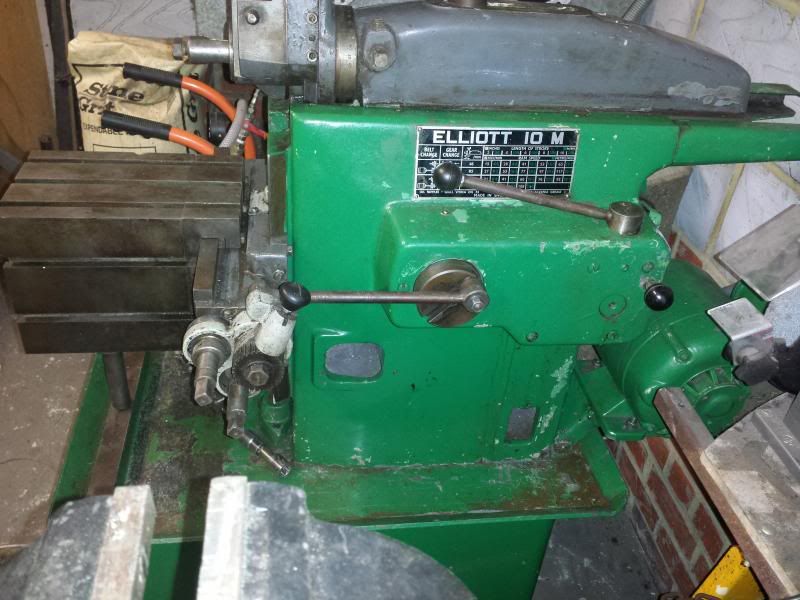
Hiya, whilst refurbishing the mill I am keeping myself amused playing with the Elliott 10M Shaper I picked up the other week.
It came with a variety of tooling, most of which seems to be to large to fit in the tool post or too small. I have read all the stuff I can find about grinding tools for the shaper including the articles on NEMES and I am struggling to get my head around the shape of the tool in 3 dimensions. I know I am probably just being dense but its kinda one of those things I need to see to understand. Does anyone have any pictures of shaper tools that show the shapes from various angles? Also, if the tool is too narrow for the slot in the toolpost is it acceptable to just shim out the gap? Cheers, Paul. |


Magazine Locator
Want the latest issue of Model Engineer or Model Engineers' Workshop? Use our magazine locator links to find your nearest stockist!
Sign up to our Newsletter
Sign up to our newsletter and get a free digital issue.
You can unsubscribe at anytime. View our privacy policy at www.mortons.co.uk/privacy
Latest Forum Posts
- *Oct 2023: FORUM MIGRATION TIMELINE*
05/10/2023 07:57:11 - Making ER11 collet chuck
05/10/2023 07:56:24 - What did you do today? 2023
05/10/2023 07:25:01 - Orrery
05/10/2023 06:00:41 - Wera hand-tools
05/10/2023 05:47:07 - New member
05/10/2023 04:40:11 - Problems with external pot on at1 vfd
05/10/2023 00:06:32 - Drain plug
04/10/2023 23:36:17 - digi phase converter for 10 machines.....
04/10/2023 23:13:48 - Winter Storage Of Locomotives
04/10/2023 21:02:11 - More Latest Posts...
- View All Topics
Support Our Partners


Shopping Partners
Subscription Offer

Latest "For Sale" Ads
- Reeves** - Rebuilt Royal Scot by Martin Evans
by John Broughton
£300.00 - BRITANNIA 5" GAUGE James Perrier
by Jon Seabright 1
£2,500.00 - Drill Grinder - for restoration
by Nigel Graham 2
£0.00 - WARCO WM18 MILLING MACHINE
by Alex Chudley
£1,200.00 - MYFORD SUPER 7 LATHE
by Alex Chudley
£2,000.00 - More "For Sale" Ads...
Latest "Wanted" Ads
- D1-3 backplate
by Michael Horley
Price Not Specified - fixed steady for a Colchester bantam mark1 800
by George Jervis
Price Not Specified - lbsc pansy
by JACK SIDEBOTHAM
Price Not Specified - Pratt Burnerd multifit chuck key.
by Tim Riome
Price Not Specified - BANDSAW BLADE WELDER
by HUGH
Price Not Specified - More "Wanted" Ads...
Get In Touch!
Do you want to contact the Model Engineer and Model Engineers' Workshop team?
You can contact us by phone, mail or email about the magazines including becoming a contributor, submitting reader's letters or making queries about articles. You can also get in touch about this website, advertising or other general issues.
Click THIS LINK for full contact details.
For subscription issues please see THIS LINK.
Digital Back Issues


Donate

 Register
 Log-in
Model Engineer Magazine
- Percival Marshall
- M.E. History
- LittleLEC
- M.E. Clock

ME Workshop
- An Adcock
- & Shipley
- Horizontal
- Mill

Subscribe Now
- Great savings
- Delivered to your door

Pre-order your copy!
- Delivered to your doorstep!
- Free UK delivery!